The New Era of Ubuntu Remote Desktop
Five years after the 2020 article, the Ubuntu remote desktop environment has evolved dramatically. This article provides a detailed explanation of the latest and most practical remote desktop setup methods for Ubuntu 24.04 LTS (Noble Numbat) and the upcoming Ubuntu 25.04.
Main Changes and New Features (2020 → 2025)
🚀 Major Evolution Points
- Native RDP Support from Ubuntu 24.04
- Native support for the Microsoft RDP protocol in GNOME 46 and later.
- In some cases, xrdp installation is no longer necessary.
- Wayland vs Xorg Challenges
- Wayland is the default in Ubuntu 24.04.
- Compatibility issues with xrdp exist (switching to Xorg may be necessary).
- Ubuntu 25.10 and later are planned to be Wayland-only.
- Enhanced GUI Support in WSL2
- Native GUI app support with WSLg.
- A full desktop environment can now be built even in WSL2.
- Security Improvements
- Addition to the
ssl-certgroup is now mandatory. - Stronger encryption options.
- Addition to the
🖥️ Ubuntu Remote Desktop Setup Methods
Visual Guide – 4 Methods Explained with Diagrams!
⚠️ Note: No session persistence (will be improved in GNOME 47)
⚠️ Note: Wayland/Xorg issues, additional configuration required
⚠️ Note: High resource consumption, requires understanding of virtual environments
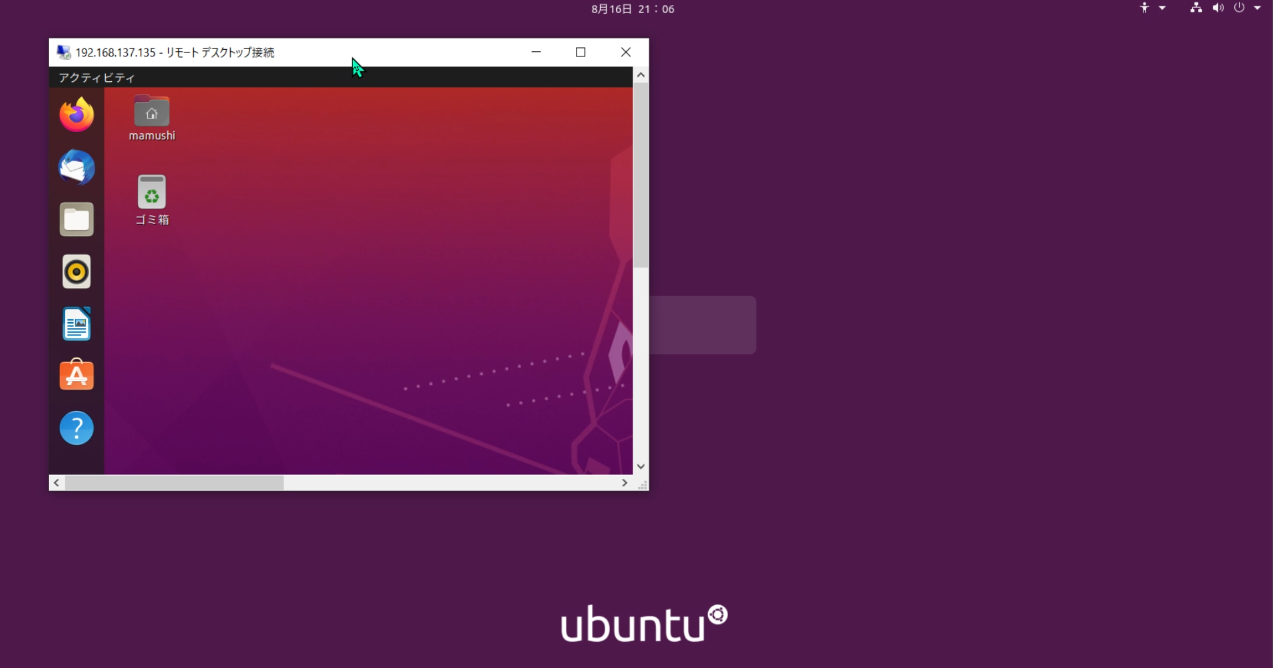
💡 Connection: Windows RDP Client → localhost:3390
• Recommend only one RDP service per machine
• Avoid simultaneous use of Native RDP and xrdp
• WSL2 operates in independent network space
Method 1: Using Ubuntu 24.04’s Native RDP Feature [Easiest]
Ubuntu 24.04 has two built-in remote desktop options: “Desktop Sharing” and “Remote Login”.
Desktop Sharing Setup
To share an already logged-in desktop:
# Open the settings screen
gnome-control-center
- Go to “Settings” → “System” → “Remote Desktop”.
- Select the “Desktop Sharing” tab.
- Turn on “Remote Desktop”.
- Set “Username and Password” under “Authentication”.
- Check the port number (default: 3389 or 3390).
Remote Login Setup
To connect directly from the login screen:
- Select the “Remote Login” tab.
- Turn on “Enable Remote Login”.
- Set up authentication information.
Note: If you enable both, the Desktop Sharing port will automatically change to 3390.
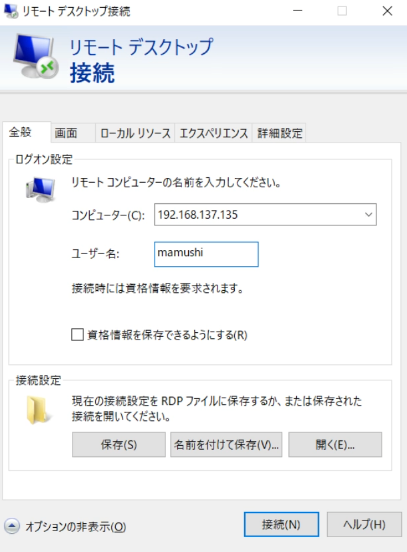
Connection Method
From Windows:
mstsc /v:Ubuntu_IP_address:3389
Method 2: Using an xrdp Server [Most Stable]
xrdp is still one of the most stable remote desktop solutions.
Installation and Basic Setup
# Update the system
sudo apt update && sudo apt upgrade -y

# Install xrdp
sudo apt install xrdp -y

# Enable and start the service
sudo systemctl enable xrdp
sudo systemctl start xrdp

# Check the status
sudo systemctl status xrdp
Important: Granting Access to SSL Certificates
You need to add the xrdp user to the ssl-cert group:
sudo adduser xrdp ssl-cert
sudo systemctl restart xrdp
Selecting and Installing a Desktop Environment
Lightweight Xfce (Recommended)
sudo apt install xfce4 xfce4-goodies -y
echo "xfce4-session" > ~/.xsession
Full-featured GNOME
sudo apt install ubuntu-desktop -y
Lightweight LXDE
sudo apt install lubuntu-desktop -y
Solving the Wayland/Xorg Problem
In Ubuntu 24.04, Wayland is the default, but xrdp is more stable running on Xorg.
How to Switch to Xorg
- Edit the GDM configuration:
sudo nano /etc/gdm3/custom.conf
- Uncomment the following line:
#WaylandEnable=false
→
WaylandEnable=false
- Restart the system:
sudo reboot
Firewall Configuration
# Open port 3389 with UFW
sudo ufw allow 3389/tcp
sudo ufw allow from 192.168.1.0/24 to any port 3389  # Allow only from LAN
sudo ufw enable
sudo ufw status
Performance Optimization
# Edit xrdp.ini
sudo nano /etc/xrdp/xrdp.ini
Set the following:
[Globals]
max_bpp=24      # Change from 32 to 24
crypt_level=high # Set encryption level to high

[Xorg]
xserverbpp=24   # Set color depth to 24-bit
Method 3: Building an Ubuntu Desktop Environment with WSL2
You can build a complete Linux desktop environment even with WSL2.
Preparing WSL2
Run in PowerShell (with administrator privileges):
# Install WSL2
wsl --install

# Set default version to 2
wsl --set-default-version 2

# Install Ubuntu 24.04
wsl --install -d Ubuntu-24.04
GNOME Desktop Setup in WSL2 Ubuntu
# Update the system
sudo apt update && sudo apt upgrade -y

# Enable systemd (required for WSL2)
sudo systemctl enable systemd

# Install GNOME desktop
sudo apt install ubuntu-desktop gnome -y

# Install and configure xrdp
sudo apt install xrdp -y
sudo cp /etc/xrdp/xrdp.ini /etc/xrdp/xrdp.ini.bak
sudo sed -i 's/3389/3390/g' /etc/xrdp/xrdp.ini
sudo sed -i 's/max_bpp=32/max_bpp=128/g' /etc/xrdp/xrdp.ini

# Session configuration
echo "gnome-session" > ~/.xsession

# Start services
sudo systemctl enable dbus
sudo systemctl start dbus
sudo systemctl start xrdp
Connection
Check the WSL IP address in the Windows Remote Desktop client and connect:
ip addr show eth0
Connect to: localhost:3390
Method 4: Alternative Solutions
VNC Server (TigerVNC)
Uses the traditional VNC protocol:
sudo apt install tigervnc-standalone-server -y
vncserver -xstartup /usr/bin/gnome-session
x2go (NX Protocol)
X2Go is a remote desktop solution that works fast even on low-bandwidth connections:
sudo apt install x2goserver x2goserver-xsession -y
NoMachine (Commercial/Free versions available)
A fast and easy-to-use commercial solution:
# Download and install
wget https://download.nomachine.com/download/8.14/Linux/nomachine_8.14.2_1_amd64.deb
sudo dpkg -i nomachine_*.deb
Troubleshooting
If a Black Screen Appears
- Resolve IBus notification error:
# Set environment variables
sudo mkdir -p /etc/environment.d/
echo "unset GTK_IM_MODULE" | sudo tee /etc/environment.d/ibus-custom.conf
echo "unset QT_IM_MODULE" | sudo tee -a /etc/environment.d/ibus-custom.conf
sudo reboot
- Edit startwm.sh:
sudo nano /etc/xrdp/startwm.sh
Comment out the last two lines and add the following:
# test -x /etc/X11/Xsession && exec /etc/X11/Xsession
# exec /bin/sh /etc/X11/Xsession
gnome-session
Resolving Port Conflicts
If multiple RDP services are conflicting:
# Check which ports are in use
sudo ss -plnt | grep 3389
sudo netstat -tulpn | grep 3389

# Stop the conflicting service
sudo systemctl stop gnome-remote-desktop
Session Persistence Issues
Ubuntu 24.04’s native RDP currently cannot maintain sessions. This is expected to be improved in GNOME 47.
Workarounds:
- Use xrdp
- Use VNC or x2go
- Maintain terminal sessions with screen/tmux
Security Best Practices
1. Use SSH Tunneling
# Create an SSH tunnel
ssh -L 3389:localhost:3389 user@ubuntu-server
2. Use a VPN
Set up OpenVPN or WireGuard to establish a secure connection.
3. Implement Two-Factor Authentication
sudo apt install libpam-google-authenticator -y
google-authenticator
4. Stricter Firewall Rules
# Allow only from a specific IP address
sudo ufw allow from 192.168.1.100 to any port 3389
Performance Optimization Tips
Client-Side Settings
Windows Remote Desktop Connection:
- Screen color: 16-bit (24-bit for high-speed connections)
- Resolution: 1280×720 (for low-speed connections)
- Experience: Auto-detect based on connection speed
Server-Side Optimization
# Disable unnecessary visual effects
gsettings set org.gnome.desktop.interface enable-animations false

# Disable wallpaper
gsettings set org.gnome.desktop.background picture-uri ''
Expected Changes in Ubuntu 25.04
Ubuntu 25.04 is scheduled for release on April 17, 2025, and xRDP is expected to continue working.
Main changes:
- Adoption of GNOME 48
- Wayland improvements
- Enhanced security features
Summary
As of now, there are various options for Ubuntu’s remote desktop environment:
- For simplicity: Ubuntu 24.04’s native RDP feature
- For stability: xrdp + Xfce
- For WSL2 environment: xrdp + lightweight desktop environment
- For low-bandwidth environments: x2go or NoMachine
Choose the best method according to your needs and environment.
References
Old Article (2020 Version)
The following is the article from 2020. It is kept for historical reference.
To establish a remote desktop connection, you need to install an Xrdp server on Ubuntu.
sudo apt install xrdp
Also, let’s make sure it starts up after a reboot.
sudo systemctl enable xrdp
Let’s also check the status.
sudo systemctl status xrdp
Next, we will open port 3389, which is used for RDP. Since we installed a GUI tool called Firewall, we used it this time to set it to the listening state. If you were to enter the command, you would type the following.

sudo ufw allow from any to any port 3389 proto tcp
The setup is complete. After checking the IP address of the machine running Ubuntu, let’s log out.
Now, let’s launch Remote Desktop Connection on Windows 10, enter the necessary information, and check if we can connect.