ArozOS Latest Installation Guide
Last Updated: October 1, 2025
This guide provides detailed, beginner-friendly installation instructions for the latest version of ArozOS (v2.021). It focuses primarily on Windows setup while addressing common installation challenges and troubleshooting solutions.
Latest ArozOS Updates
ArozOS v2.021 has been released as the latest version, featuring login cookie Lax mode support, CPU usage bug fixes, new wallpaper pack additions, and other improvements. Future plans include a major rewrite to v3, with support for distributed computing, storage, and authentication architectures.
Detailed Windows Installation Instructions
1. Prerequisites Check
To ensure successful Windows installation, verify the following requirements:
System Requirements:
- Windows 10 or later (Windows 11 supported)
- 64-bit version recommended (arm64 version experimentally supported)
- Administrator privileges user account
- Free disk space: minimum 2GB or more
- Memory: minimum 512MB or more (recommended 2GB or more)
2. Detailed FFmpeg Installation Instructions
On Windows, FFmpeg must be added to the %PATH% environment variable. Here’s a fail-safe procedure for beginners.
Step 1: Download FFmpeg
- Choose Download Source
- Download trusted Windows builds from gyan.dev or BtbN’s GitHub repository
- Recommended: Download “release essentials” version from https://www.gyan.dev/ffmpeg/builds/
- The essentials version is sufficient for beginners (covers most use cases)
- File Selection
- “ffmpeg-release-essentials.7z” (lightweight version, about 31MB)
- “ffmpeg-release-full.7z” (full version, all codecs supported)
Step 2: Extract and Place FFmpeg
Prepare Extraction Software
- Install 7-Zip (https://www.7-zip.org/)
- Right-click the downloaded .7z file → “7-Zip” → “Extract Here”
Determine Placement Location
Recommended location: C:\ffmpeg

⚠️ Important: Avoid paths with spaces (e.g., Program Files)
Verify Folder Structure
C:\ffmpeg\
├── bin\
│   ├── ffmpeg.exe    ← This is required
│   ├── ffplay.exe
│   └── ffprobe.exe
├── doc\
└── presets\
Step 3: Add to PATH Environment Variable (Most Important)
Method A: GUI Method (Recommended for Beginners)
Open System Properties
- Press Windows + X keys
- Select “System”
- Click “Advanced system settings”
Configure Environment Variables
Steps:
1. Click “Environment Variables” button
2. Select “Path” from “System Variables”
3. Click “Edit” button
4. Click “New” button
5. Enter C:\ffmpeg\bin (path to bin folder)
6. Click “OK” three times to save settings
Verify Configuration
- Restart PC (Important!)
- Open Command Prompt (Win+R → cmd → Enter)
- Enter the following command:
ffmpeg -version- Success if version information is displayed
Method B: PowerShell Method (For Advanced Users)
Open PowerShell with administrator privileges and run:
[Environment]::SetEnvironmentVariable("Path", $env:Path + ";C:\ffmpeg\bin", [EnvironmentVariableTarget]::Machine)
3. Go Language Installation (For Building from Source)
Only required when building from source code. Skip if using binary version.
Windows Go Language Installation
Download
- Official website: https://go.dev/dl/
- Select Windows installer (.msi)
- Go 1.20 or later is required
Installation Steps
1. Double-click the downloaded .msi file
2. Click “Next” to proceed
3. Installation path: Default (C:\Program Files\Go) is OK
4. Click “Install”
5. Click “Finish” to complete
Verify Installation
go version4. ArozOS Installation (Windows Version)
Method A: Binary Version (Recommended for Beginners)
For Windows deployment, downloading binaries and web files from the Release Page is recommended.
Download Required Files
GitHub Release Page:
https://github.com/tobychui/arozos/releases
Download from latest version (v2.021):
- arozos_windows_amd64.exe
- web.tar.gz
Create Folder and Place Files
Create folder structure:
C:\ArozOS\             ← No spaces, ASCII characters only
├── arozos_windows_amd64.exe
└── web.tar.gz
Extract web.tar.gz
- Extract with 7-Zip (may extract automatically)
- Designed to auto-extract on first startup
Startup Procedure
1. Double-click arozos_windows_amd64.exe
2. If Windows Firewall warning appears, click “Allow access”
3. Command Prompt window opens (don’t close!)
4. Access http://localhost:8080 in browser
Method B: Build from Source Code (For Advanced Users)
Install Git for Windows
- Download from https://git-scm.com/download/win
- Install with default settings
Get Source Code and Build
git clone https://github.com/tobychui/arozos
cd arozos\src
go mod tidy
go build
Launch
arozos.exe5. Initial Setup and Troubleshooting
First Startup Configuration
- Create Administrator Account
- Username: alphanumeric characters only (no Japanese)
- Password: 8 characters or more recommended
- Email address: for password reset
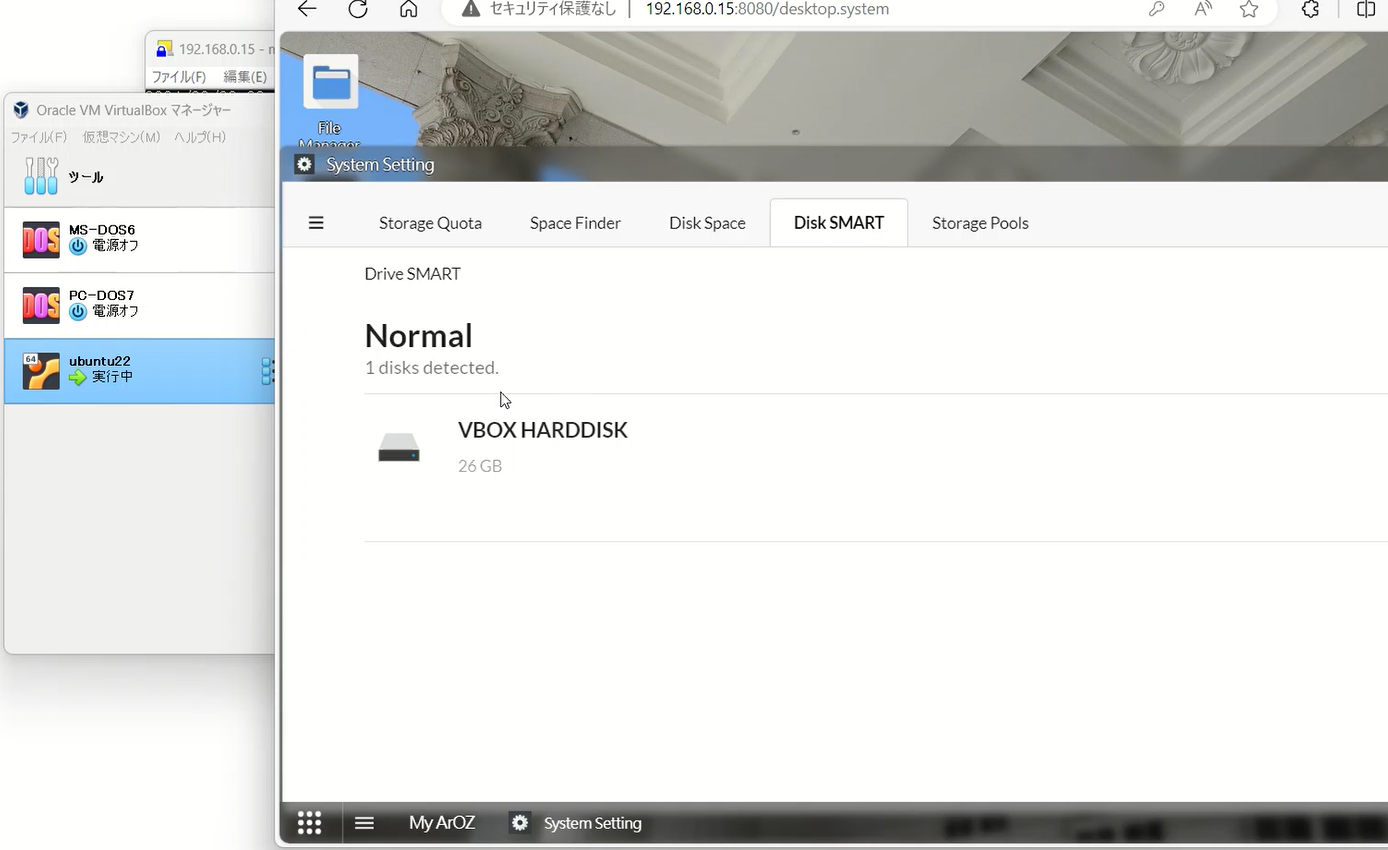
- Configure Storage Pool In System Settings > Disk & Storage > Storage Pools, configure disk settings
- Name: easy-to-understand name (e.g., LocalDrive)
- UUID: unique identifier (alphanumeric only, e.g., local1)
- Path: C:\Users[username]\ArozOSFiles (example)
Common Issues and Solutions
Issue 1: Port 8080 in use
# Start on different port
arozos_windows_amd64.exe -port 8081
Issue 2: FFmpeg not recognized
- Symptom: Cannot play video/music files
- Solution:
- Re-check PATH environment variable
- Restart PC
- Verify with
ffmpeg -version
Issue 3: Blocked by firewall
- Solution: Add to Windows Firewall exceptions
Settings → Update & Security → Windows Security
→ Firewall & network protection → Allow an app
→ Add arozos_windows_amd64.exe
Issue 4: web.tar.gz not extracting
- Manually extract with 7-Zip
- Verify web and system folders are correctly placed
6. Advanced Configuration and Best Practices
Utilizing Startup Options
ArozOS supports numerous startup parameters for customization based on use case:
# Start with HTTPS (certificate required)
arozos_windows_amd64.exe -tls=true -tls_port 443 -key mykey.key -cert mycert.crt

# Change maximum upload size (default 8192MB)
arozos_windows_amd64.exe -max_upload_size 25

# Demo mode (read-only)
arozos_windows_amd64.exe -demo_mode=true

# Enable both HTTP and HTTPS
arozos_windows_amd64.exe -port 80 -tls=true -key mykey.key -cert mycert.crt -tls_port 443
Run as Service (Auto-start)
Using Windows Task Scheduler:
- Open Task Scheduler
- Select “Create Task”
- Trigger: “At system startup”
- Action: “Start a program”
- Program:
C:\ArozOS\arozos_windows_amd64.exe - Start in:
C:\ArozOS
- Program:
- Check “Run with highest privileges”
Security Hardening
- HTTPS Configuration
- Obtain certificates from Let’s Encrypt etc.
- Use
-tls=trueoption at startup
- Access Restrictions
- Allow only specific IPs via firewall
- Recommend access via VPN
- Regular Backups
- Regular backup of system and files folders
- Protect database files
7. Easy Installation Using Docker (Alternative Method)
ArozOS deployment using Dockerfile is also possible:
# After installing Docker Desktop
docker pull [docker-image-name]
docker run -p 8080:8080 -v C:\ArozOSData:/data [docker-image-name]
8. Network Drive Integration
ArozOS can mount various network file systems (SMB, SFTP, WebDAV, FTP):
SMB Share Configuration Example:
- System Settings → Disk & Storage → Storage Pools
- Click “Add Storage”
- File System Type: SMB
- Path:
\\192.168.1.100\SharedFolder - Enter username and password
9. Testing with VirtualBox (Test Environment)
For testing before production deployment, building Ubuntu Server environment with VirtualBox is recommended:
- VirtualBox Configuration
- Memory: Allocate 2GB or more
- Disk: 20GB or more
- Network: Bridge Adapter
- Port Forwarding
Host port: 8080 → Guest port: 8080 - After Ubuntu Server Installation
- Follow Linux installation instructions below
Practical Implementation: Ubuntu Installation (February 2024 Publication)
What is ArozOS? The main content is as follows. I actually tried it, and being able to operate it through a browser was the most convenient feature. I think it has many other applications as well.
Before installation, let me describe its features. ArozOS is an open-source web-based desktop environment and file management system. It primarily runs on Linux and BSD systems and is characterized by easy setup and use. Below are its main features summarized. This is perfect for beginners with its complete set of features.
ArozOS Features
- Multi-platform Support:
- Runs on various operating systems (OS). Particularly common for use on Linux and BSD-based OS.
- Web-based Desktop Environment:
- Provides a graphical desktop interface accessible through browsers. This allows system access from anywhere via internet connection.
- File Management:
- Features advanced file management capabilities, allowing file upload, download, and editing directly from the web interface.
- Modularity and Extensibility:
- Various modules and applications can be integrated with high customizability. Users can add their own functions.
- IoT Device Integration:
- Features IoT (Internet of Things) device integration, allowing remote device management and control.
- Low Resource Requirements:
- Operates with relatively low system resources, making it usable on older hardware or resource-limited environments.
Summary
ArozOS provides a web-based desktop environment accessible from remote locations, featuring comprehensive functionality including file management, system management, and IoT device integration. Its flexibility and customizability are particularly attractive features for engineers and DIY enthusiasts.
ArozOS has multifunctionality and flexibility, allowing explanation from various perspectives. Thus, explanations of ArozOS may emphasize different aspects depending on the target audience and context. Technical explanations for engineers focus on development details, while general user explanations center on ease of use and basic functions, resulting in explanation differences. Below is a technical explanation.
ArozOS Web App Development
- AGI (ArozOS Gateway Interface): Interface for facilitating backend development of ArozOS web apps. Based on Otto JavaScript virtual machine with compatibility for modern JavaScript syntax.
Creating Web Apps
- To create new web apps, create a new folder within the
./web/folder under ArozOS root and place required files (e.g.,init.agi,index.html). - Startup Script (init.agi): Script containing configuration and environment checks to make ArozOS recognize this folder as a web app.
Frontend Development
- ArozOS frontend development is no different from regular web app development.
- Accessible in different modes (Web desktop mode, mobile desktop mode, standalone mode, PWA mode).
Backend Development
- AGI Script Execution: Use
agi_runfunction fromao_module.jswrapper to execute AGI scripts from frontend JavaScript code.
AGI-Related Libraries
- System: Function group available in AGI runtime.
- User: Function group available in user scope.
- Serverless: Enables dynamic programming through external AGI calls.
- FileLib: Used for file system interaction.
- AppData: Provides read-only access to files within web folders.
- ImageLib: Provides basic image processing functionality.
- HTTP: Used for executing GET, POST, HEAD, and download requests.
- Websocket: Used for upgrading from regular HTTP requests to WebSocket connections.
- IoT: Provides easy access to IoT device control endpoints.
- Share: Used for accessing ArozOS sharing interface and generating UUIDs based on shared files.
Application Examples
- Telegram Bot (Serverless): Uses serverless functionality to process external HTTP requests.
- User Space Execution (Serverless): Used for dynamic script import and execution in user space.
This explains the overview of developing web apps on ArozOS, various functions using AGI, and frontend and backend development methods. I will install this convenient OS on a CLI-based Ubuntu.
I will proceed with reference to the following page.
https://github.com/tobychui/arozos
According to the description, Go language version 1.20 or higher is required, and FFmpeg (probably for Windows) is also necessary. Optionally, wpa_supplicant or nmcli may also be required.
I will install it on my home CLI-based ubuntu22.04. The LCD is hard to see, so I’ll work via SSH connection.
First, I’ll install Go language. I’ll get the download link for Linux from the official page.
Go language (commonly called Go or Golang) is a programming language developed by Google. Below is a brief explanation of Go language’s main features and its convenience.
Go Language Features
- Compiled Language:
- Go is a compiled language where source code is converted to binary code before execution. This results in faster execution speed.
- Static Typing:
- Adopts static typing where variable types are determined at compile time. This reduces runtime errors.
- Simple and Readable Syntax:
- Go’s syntax is simple, readable, and easy to understand. This makes code maintenance easier.
- Concurrency Support:
- Supports efficient concurrency using the concept of lightweight threads called “goroutines.”
- Rich Standard Library:
- Provides many standard libraries for networking, encryption, data processing, etc., usable for diverse application development.
- Cross-platform Support:
- Runs on many operating systems including Windows, Linux, macOS.
Convenience
- Fast Development and Execution: Simple syntax and fast compilation and execution speed enable rapid development.
- Easy Concurrency: Implementing concurrency using goroutines is relatively easy, enabling efficient utilization of multi-core processors.
- Stable Operation: Static typing and powerful standard libraries enable building stable applications.
- Microservices Compatibility: Lightweight and fast characteristics make it compatible with microservice architecture.
Summary
Go language is considered very convenient in modern software development due to its simplicity, fast execution, and ease of concurrency. It’s particularly widely used in fields such as web services, cloud-based applications, and microservices.
These commands are Go language installation procedures for Linux environment. The meaning of each command is as follows:
wget https://go.dev/dl/go1.21.6.linux-amd64.tar.gz- This command downloads Go language binary files from the internet. The URL here is for downloading Go language version 1.15.3 for Linux on ARMv6 architecture.
wgetis a command for downloading files from the web.
- This command downloads Go language binary files from the internet. The URL here is for downloading Go language version 1.15.3 for Linux on ARMv6 architecture.
sudo tar -C /usr/local -xzf go1.21.6.linux-amd64.tar.gz- This command extracts and installs the downloaded Go language archive (tar.gz file).
sudois a command for executing commands with administrator privileges (when necessary).taris a command used for creating and extracting archives. In this case,-C /usr/localoption specifies the extraction destination directory, and-xzfoption extracts compressed archives.
- This command extracts and installs the downloaded Go language archive (tar.gz file).
echo 'export PATH=$PATH:/usr/local/go/bin' >> .bashrc- This command adds the Go language executable path to the PATH environment variable when the shell starts.
echois a command that displays specified strings, but here it’s combined with>> .bashrcto append the string to the end of the.bashrcfile. This makes Go commands available in new terminal sessions.
- This command adds the Go language executable path to the PATH environment variable when the shell starts.
source ~/.bashrc- This command loads the modified
.bashrcfile and applies it to the current shell session. Thesourcecommand executes commands within the specified file in the current shell session.
- This command loads the modified
go version- This command displays the version of the installed Go language. This allows verification that Go is correctly installed.
By executing these steps, you can install Go language on a Linux system and prepare it for use. The downloaded file is no longer needed, so delete it.
sudo rm go1.21.6.linux-amd64.tar.gz
Next, build arozos from source code. The content is the same as described on GitHub.
git clone https://github.com/tobychui/arozos
cd ./arozos/src/
go mod tidy
go build
./arozos
#sudo ./arozos for enabling hardware and WiFi management features
Let me explain this command sequence. This is a series of steps to clone source code from the “arozos” project on GitHub, build it, and execute it. Below are explanations for each command.
git clone https://github.com/tobychui/arozos:- This command copies (clones) source code from the “arozos” repository on GitHub.
git cloneis used to create a copy of a remote repository on a local machine.
cd ./arozos/src/:- The
cd(change directory) command moves to thesrcfolder within the cloned repository. - This folder contains the source code for building.
- The
go mod tidy:- A command used in Go language projects that organizes project dependencies and downloads necessary modules.
- This command organizes the project’s
go.modandgo.sumfiles and automatically resolves necessary dependencies.
go build:- A Go language command that compiles source code and generates executable binary files.
- This process creates files for actually running programs from source code.
./arozos:- This is a command to execute the built executable file
arozos. - If the build was successful, the
arozosprogram will start.
- This is a command to execute the built executable file
sudo ./arozos:- This command executes
arozoswith superuser privileges (root privileges). - Running with superuser privileges enables functions requiring special privileges, such as hardware and WiFi management features.
- This command executes
This procedure is a common method for building and executing programs directly from source code. Basic understanding of Go language and software development is required.
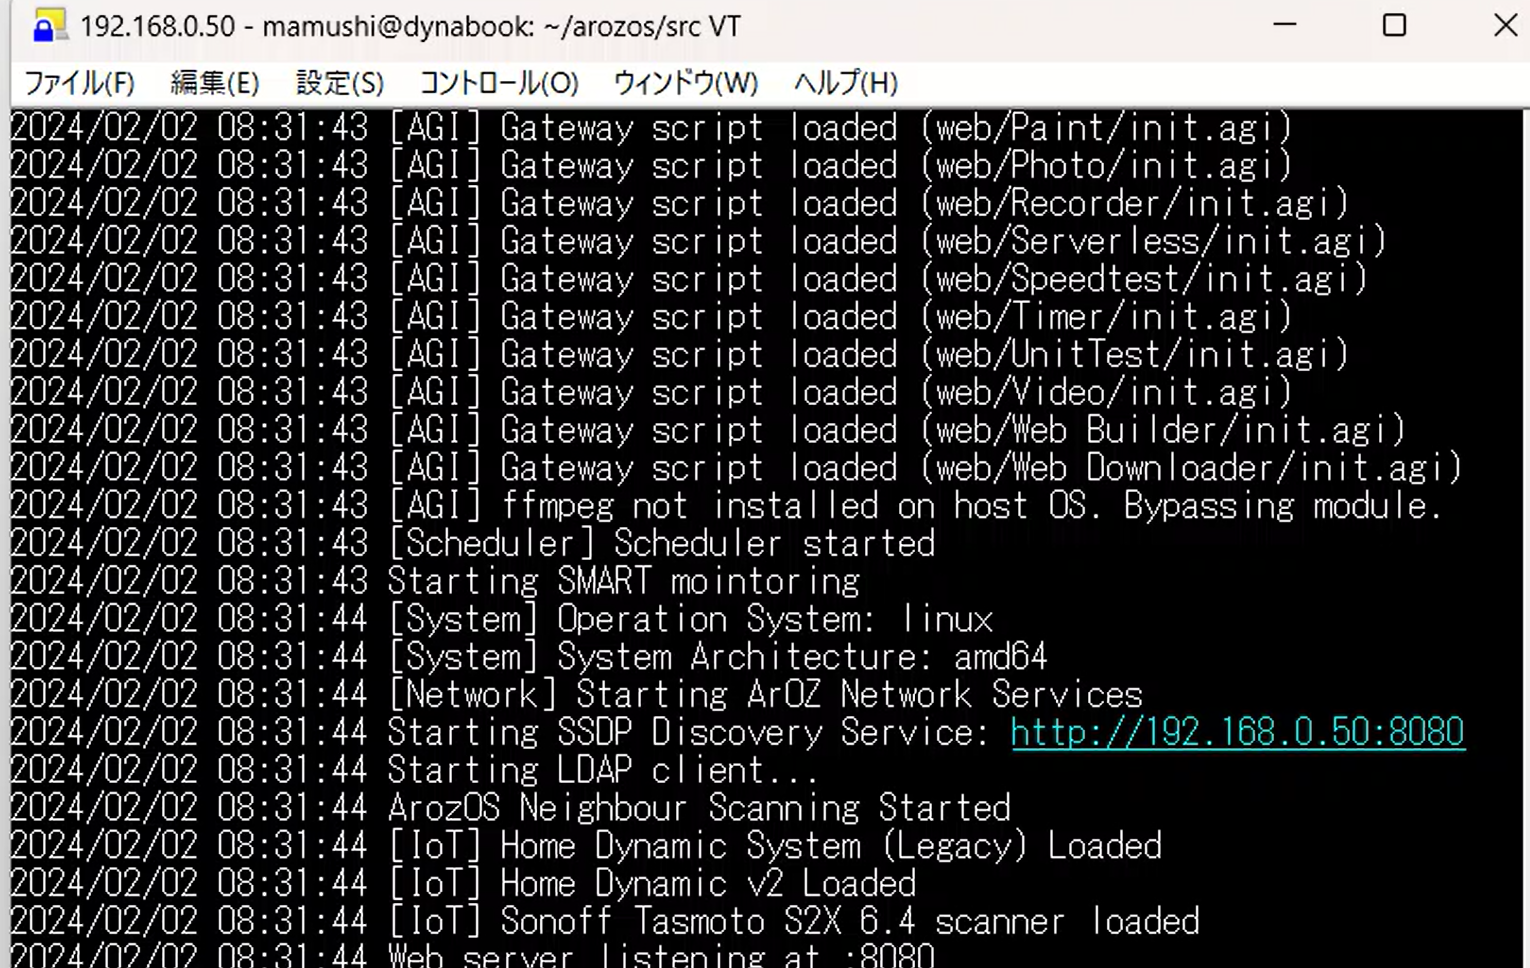
With the above operations, ArozOS is ready to be operated through a browser. http://Machine-IP-Address:8080
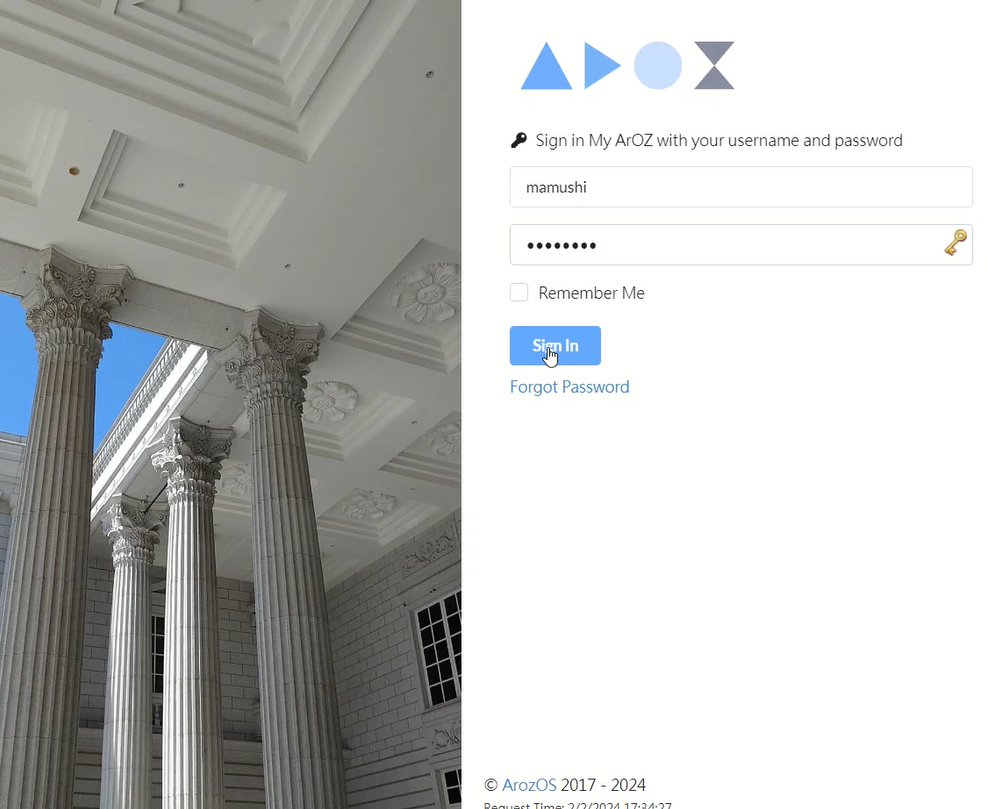
Set username and password on first access.
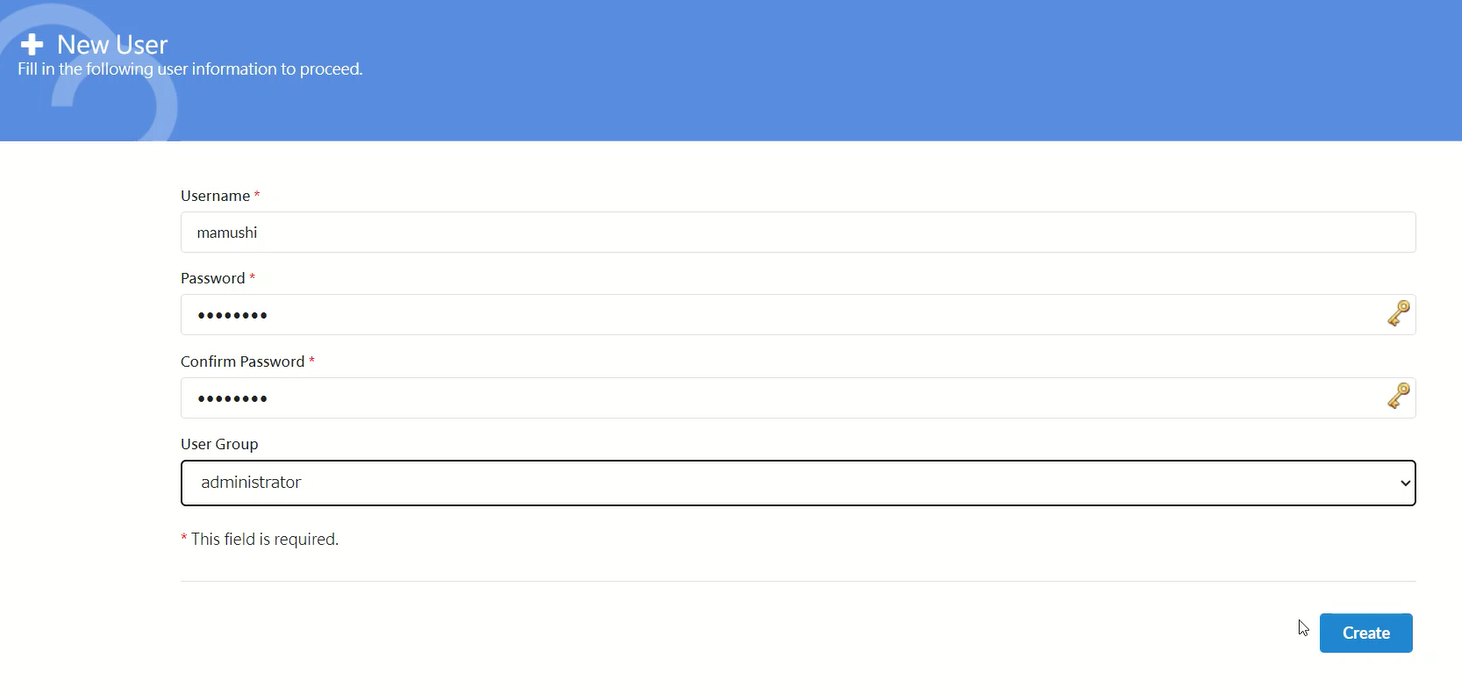
After that, logging in with this account allows you to operate ArozOS.

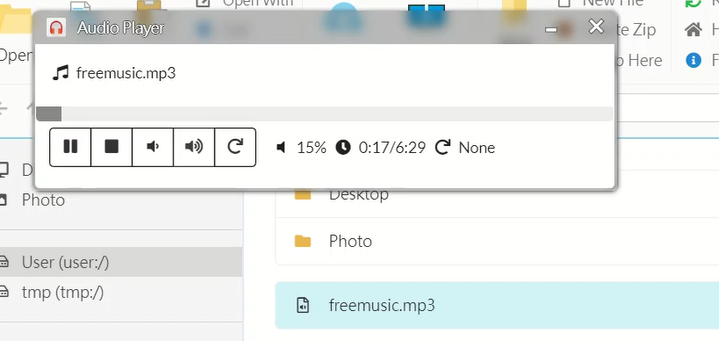
File transfer between host and ArozOS is also possible. As a test, I transferred a music file and listened to it – sound came out. The sound comes from the operating PC, not the server side.

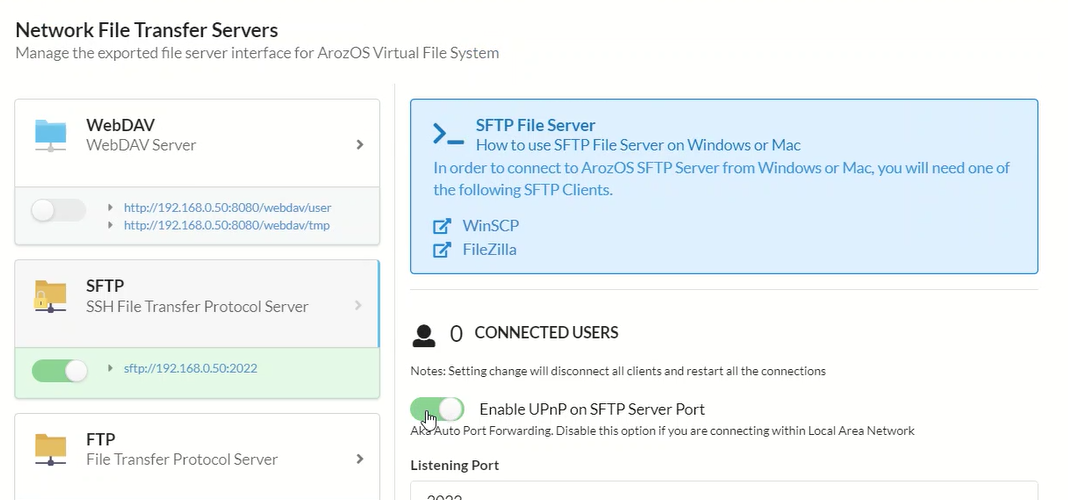
It can also be set up as a file server, with file transfer protocols selectable from WebDAV, SFTP, and others.
ArozOS is equipped with basic applications such as text editors and paint software. These tools are available for direct use within ArozOS’s web-based desktop environment. Specifically, the following functions are included:
- Text Editor:
- Provides a basic text editor for creating and editing simple text files. Supports basic text processing including code editing.
- Paint Software:
- Features a paint application with basic drawing and image editing capabilities. This enables simple graphic creation and image modification.
- File Manager:
- Includes a file manager for managing files and folders, uploading and downloading files.
- Other Utilities:
- Often includes basic utilities for daily use such as calendar, calculator, music player.
In addition to these basic applications, ArozOS allows various additional features and customizations. Developers and users can add custom modules and applications to extend system functionality.
There seems to be a Windows version as well, but installing Ubuntu Server on VirtualBox and following the same installation method as above will work. Set up port forwarding as well. Access is possible not only from PCs but also from smartphones with browsers.