
📢 Introduction: Why This Guide Matters
Did you know? MCP is a completely free open standard. However, Figma’s official Dev Mode MCP Server is limited to paid plans ($15/month or more).
Good news: You can do the same thing for free with just a Personal Access Token!
This article provides extremely detailed instructions so that even Figma free plan users can achieve code generation from designs using MCP, ensuring success even for beginners.
What You Can Achieve
- ✅ Automatically generate React/Vue/HTML code from Figma designs
- ✅ AI-assisted development with Claude Code or Codex CLI
- ✅ Automatic extraction of design tokens
- ✅ Completely free implementation (no paid plan required)
🎓 Background: What is MCP?
About Model Context Protocol (MCP)
MCP is a completely free open standard that Anthropic open-sourced in November 2024. Think of it as a “USB-C port” for connecting AI assistants to external tools and data sources.
Why Did Figma Make It Paid?
- MCP itself: Open source and completely free
- Figma official server: Limited to Dev Mode (paid plan)
- Solution: Use free community-developed alternative servers
🛠 Preparing Required Tools
Required Environment (All Free)
1. Node.js (18 or later)
# Check installation
node --version

# Should show v18 or later
# If not installed: download from https://nodejs.org/
2. npm or pnpm
# Check npm (included with Node.js)
npm --version

# Or pnpm (faster alternative)
npm install -g pnpm
3. Text Editor (Choose One)
- VS Code: https://code.visualstudio.com/
- Cursor: https://cursor.com/
- Windsurf: https://codeium.com/windsurf
4. Claude Code or Codex CLI (explained in detail later)
👤 Creating and Setting Up Figma Account
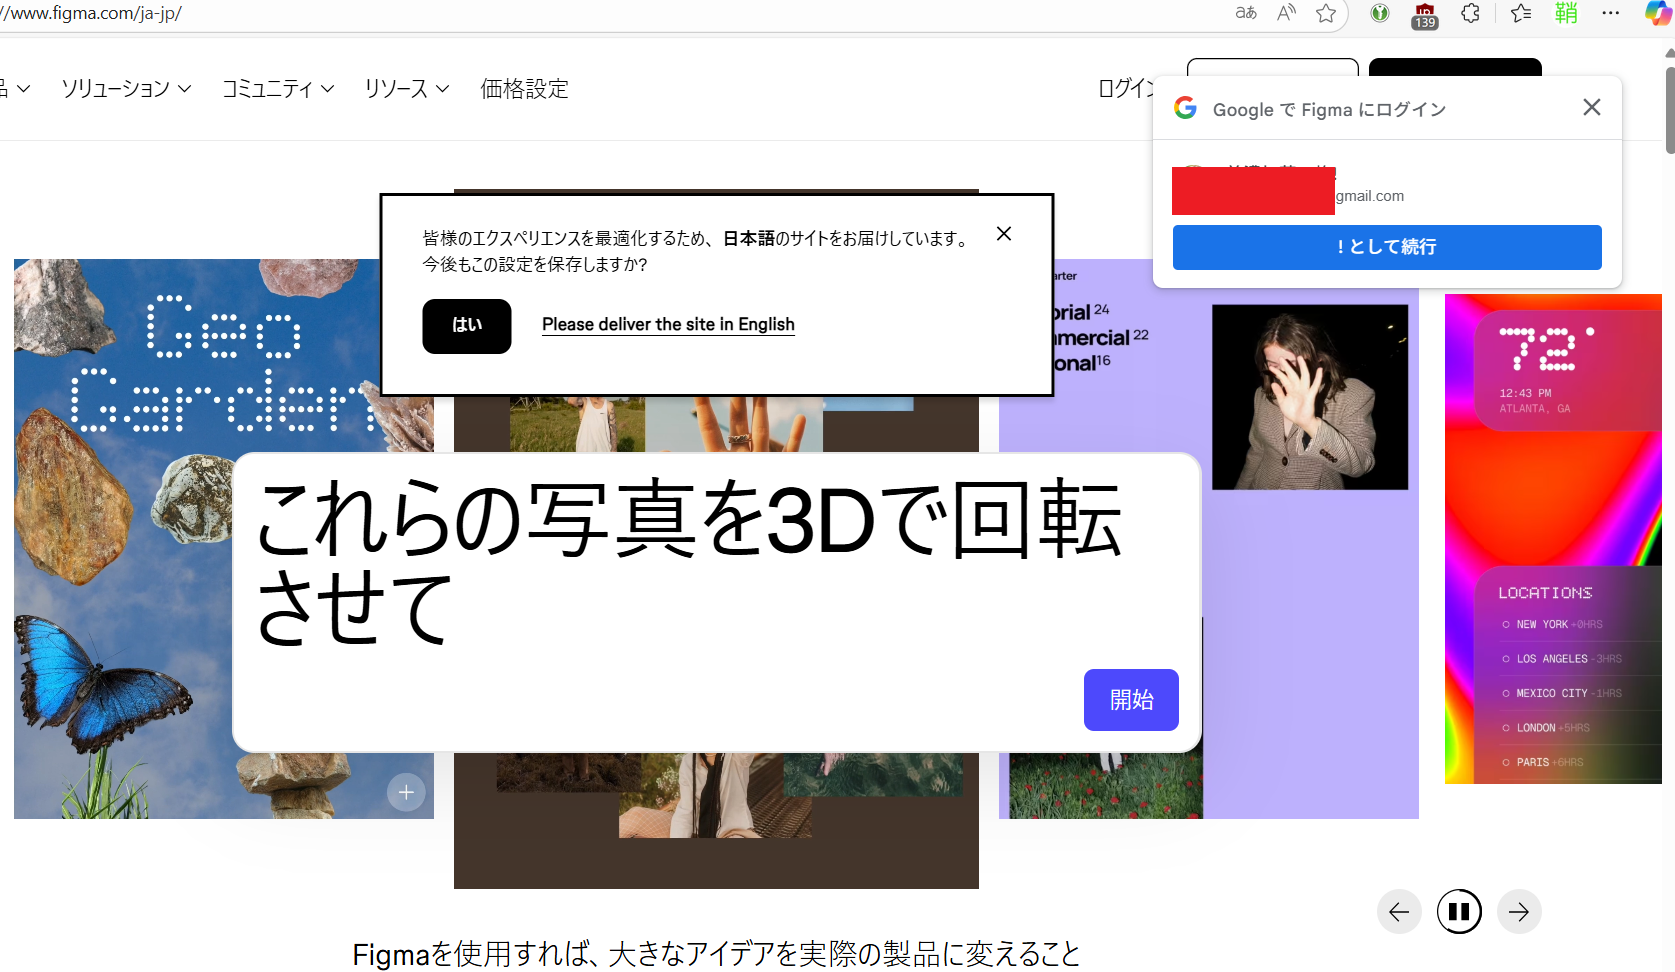
Step 1: Create Figma Account
- Visit Figma Website https://www.figma.com/
- Click “Sign up”
- Register with email or Google account (may automatically log in) In that case, you’ll be automatically logged in with a free plan. If you’ve used it before, the following steps may not be necessary.
- Important: Select the free plan (Starter)
- Email Verification
- Click the confirmation link sent to your registered email
- Profile Setup
- Enter your name
- Select usage purpose (Personal project is fine)
Step 2: Install Figma Desktop App (Recommended)
- Access Download Page
https://www.figma.com/downloads/ - Download Version for Your OS
- Windows: .exe file
- macOS: .dmg file
- Linux: .AppImage file
- Login After Installation
- Log in with your created account
You can also download by clicking the profile icon in the upper left.
🔑 Obtaining Personal Access Token
Important: This is the Key to Using MCP for Free!
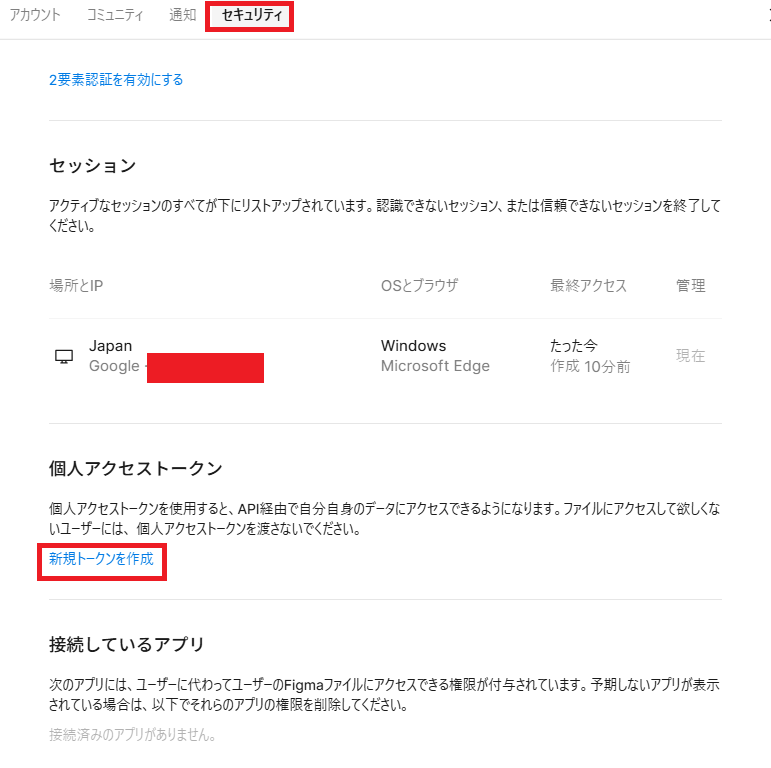
Step 1: Access Settings Screen
- Open Figma (browser or desktop app)
- Click profile icon in upper left
- Select “Settings”
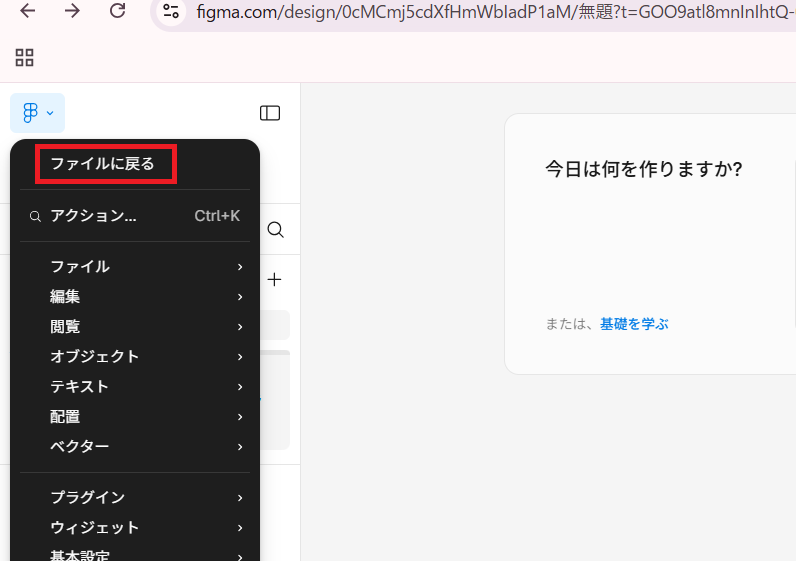
For first-time users, you may need to click “Back to files” in the upper left to access settings.
Step 2: Generate Personal Access Token
- Click “Security” tab
- Scroll down to find “Personal access tokens” section
- Click “Create new token”
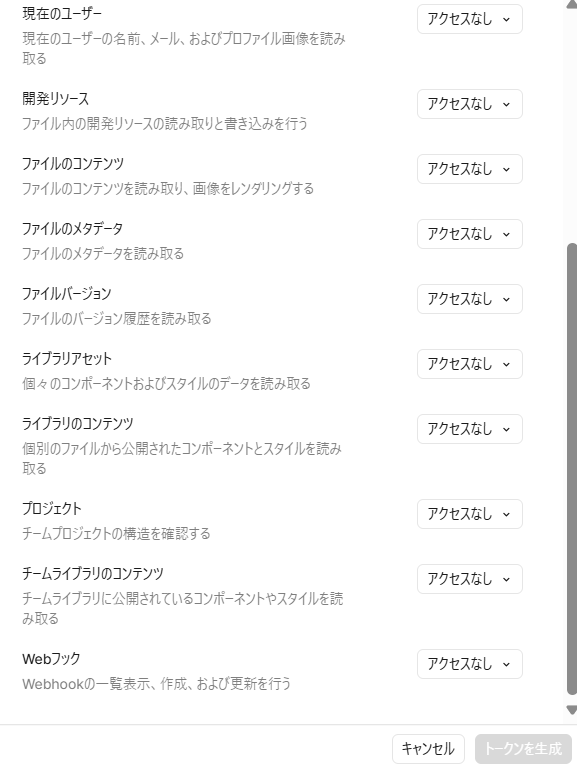
- Token Configuration
Token name: figma-mcp-free (descriptive name)
Expiration: 30 days (or desired period)

Recommended checkboxes for Figma MCP:
✅ Required (absolutely check these)

File content - Essential for reading design files
File metadata - Required for file information retrieval
Current user - Needed for API authentication verification

⚡ Recommended (maximize MCP functionality)

Library content - Component/style retrieval
Library assets - Useful for Design Token extraction
Team library content - Support for team shared components

🔧 Optional (for advanced features)

File versions - For history management features
Projects - For managing entire projects
Webhooks - Real-time sync features (planned for future)
Dev releases - Dev Mode equivalent features

🚫 Not needed

File dev releases - Unnecessary for read-only

Minimal configuration to start:
✅ Current user
✅ File content
✅ File metadata
✅ Library content
These 4 are sufficient for a functional MCP server!
If you need more permissions later, you can regenerate the token. Start with minimal configuration and expand as needed.
- Click “Generate token”
- ⚠️ Critical: Copy and Save Token
Example: figd_xxxxxxxxxxxxxxxxxxxxxxxxxxxxxxxx
- This token will never be displayed again!
- Be sure to save it in a notepad or similar
📊 Figma API Permission Restriction Structure
This is the core of the vendor lock-in strategy.
Personal Access Token (Free)
- ✅ Read-only access
- ❌ No write permissions
- ❌ Dev Mode API restrictions
Paid Plans (Dev/Full seat)
- ✅ Dev Mode API
- ✅ Some write permissions
- ✅ Advanced Webhooks
🔥 This is a Typical Example of Open Source Wrapping
Figma REST API (technically capable of read/write)
↓
Artificially add permission restrictions
↓
"Want to write? Upgrade to paid plan"
↓
Force payment structure on free technology
⚡ But Don’t Worry! Read-Only is More Than Enough
What figma-mcp-free can do:
- Design token extraction → CSS/Tailwind generation
- Component structure analysis → React/Vue generation
- Layout information retrieval → Responsive support
- Color/font information → Theme file generation
- Batch asset retrieval → Optimized image output
All of these are possible with read-only access!
🚀 Workarounds When Write Access is Needed
- Via Figma Plugin
// Execute write within plugin
figma.createComponent(componentData);
- Figma Web Automation
// Operate with Playwright/Puppeteer
await page.click('[data-testid="create-component"]');
- Utilize Import Feature
# Reverse flow via SVG/Sketch/Adobe XD
figma-mcp-free export → edit → reimport
Conclusion: Read-only is revolutionary enough!
In fact, this proves:
“Even the write permissions that Figma artificially restricts are unnecessary. Read-only can provide more value than official Dev Mode”
This is the essence of technical resistance! 🔥
💻 Setup and Usage with Claude Code
Step 1: Install Claude Code
# Install with npm
npm install -g @anthropic-ai/claude-code

# Verify installation
claude --version
Step 2: Authentication
# First launch of Claude Code
claude

# Browser opens for login with Claude account
# Or use API key
🚀 Free MCP Server Setup
Quickest Correct Connection Commands (Claude Code)
Example for adding to user scope:
# Use a new (unexposed) token
claude mcp add figma --scope user \
  --env FIGMA_API_KEY=figd_xxx \
  -- npx -y figma-developer-mcp --stdio
Verification:
claude mcp list   # figma should appear
claude            # Start Claude Code
# After startup, within editor
/mcp              # "figma" should show as Connected
--is required to separate Claude flags from server-side arguments. Anthropic
For Project Sharing
The official method is to place .mcp.json at project root:
{
  "mcpServers": {
    "figma": {
      "command": "npx",
      "args": ["-y", "figma-developer-mcp", "--stdio"],
      "env": { "FIGMA_API_KEY": "figd_xxx" }
    }
  }
}
(This file method saves to the same location as --scope project.)
Common Oversight Checklist
- .env is not automatically loaded. Either
export FIGMA_API_KEY=...or pass via--env/.mcp.jsonas above. - Token health check (verify API connection first)
curl -sH "X-Figma-Token: $FIGMA_API_KEY" https://api.figma.com/v1/meIf user JSON is returned, the key is valid. Personal Access Token uses theX-Figma-Tokenheader. - Don’t confuse with Figma Dev Mode MCP (official) That’s a separate thing used within Figma desktop. The npm version we’re using is a local stdio server, and they need to be distinguished.
- Windows native execution note (not WSL) When launching
npx, acmd /cwrapper is needed:claude mcp add my-server -- cmd /c npx -y <package>
Claude Code + Figma MCP Usage Best Practices
Prerequisites
- Figma MCP server configured with API key set
- Explicit permission for “direct Figma data retrieval” improves efficiency
Recommended Information When Requesting Implementation
- Figma link: Complete URL (including node-id parameter)
- Output destination: Specific file path (e.g.,
src/components/Button.tsx) - Components: Required file types (component + CSS + images, etc.)
- Verification method: lint, build, test commands
- Constraints: Responsive, accessibility requirements, etc.
Efficiency Tips
- Specify nodeId: Mention if specific node is determined
- Asset types: Required image formats (SVG/PNG) and sizes
- Existing file reference: Specify path if tokens.json or CSS variables exist locally
- Design system: Mention existing component patterns or style conventions
Claude Code Implementation Request Template Example
【Request】Implement Figma design as React component

**Figma URL**: https://www.figma.com/design/[fileKey]/[title]?node-id=[nodeId]
**Output destination**: src/components/[ComponentName]/
**Structure**:
- [ComponentName].tsx (main component)
- [ComponentName].module.css (styles)
- assets/ (required images)

**Requirements**:
- Responsive support (mobile/desktop)
- TypeScript strict mode compliance
- Accessibility (ARIA attributes)

**Verification**:
- npm run lint
- npm run build
- Storybook operation check

**Note**: OK to retrieve data from Figma MCP server
Claude Code Specific Advantages
- serena MCP: Efficient understanding of existing code structure with symbolic search
- Parallel execution: Fast processing with simultaneous multiple tool execution
- TodoWrite: Progress management and visualization of complex tasks
- Memory feature: Context retention through project information persistence
If Using Alternative Server (HAPINS version)
npm i -g @hapins/figma-mcp
FIGMA_ACCESS_TOKEN=figd_xxx npx @hapins/figma-mcp
(The only difference is the environment variable name is ACCESS_TOKEN)
🤖 Setup and Usage with Codex CLI
Step 1: Install Codex CLI
# Install with npm
npm install -g @openai/codex

# Or with yarn
yarn global add @openai/codex
Step 2: Initial Setup
# Start Codex
codex

# Select "Sign in with ChatGPT"
# Login in browser
Step 3: Configure MCP Server
Edit Configuration File
# Open configuration file
code ~/.codex/config.toml

# Or
nano ~/.codex/config.toml
Add the following:
# ~/.codex/config.toml

# Model (optional: gpt-5 is default if omitted)
model = "gpt-5"

[mcp_servers.figma]
command = "npx"
args    = ["-y", "figma-developer-mcp", "--stdio"]
env     = { FIGMA_API_KEY = "figd_xxx" }
The above configuration is not for “reading Figma” but to instruct how to launch/connect the MCP server.
What Each Part Means
[mcp_servers.figma]→ Registers a “server named figma” with MCP client (Codex/Claude Code, etc.)command = "npx"/args = ["-y","figma-developer-mcp","--stdio"]→ Launch npm package figma-developer-mcp withnpx. →-ymeans “automatically Yes to confirmation prompts”. →--stdiospecifies communication method, meaning connect client⇄server via standard input/output (StdIn/StdOut). 👉 This is not a switch for reading from Figma. Just choosing the MCP “transport route” (other examples: SSE/WebSocket, etc.)env = { FIGMA_API_KEY = "figd_..." }→ Pass Figma Personal Access Token to server as environment variable. Server uses this to make HTTP requests toapi.figma.comto retrieve files/nodes and export images. (This is where Figma data is actually read.--stdiois unrelated)
Overall Flow (Rough Diagram)
Client(Codex) ⇄ stdio ⇄ figma-developer-mcp(local Node process) ⇄ HTTPS ⇄ Figma API (using FIGMA_API_KEY)
Step 4: Verify Operation
# Start Codex
codex

# Check with prompt
> Show me available MCP servers

# figma should appear
🎨 Practice: Code Generation from Design
Preparation: Prepare Sample Design
Option 1: Use Your Own Design
- Create new file in Figma
- Design a simple button or card
- Select frame or component
Option 2: Use Public Design System
Material 3 Design Kit:
https://www.figma.com/community/file/1035203688168086460
Actual Code Generation
Usage Example with Claude Code
# Start Claude Code
claude

# Copy Figma link (example)
# https://www.figma.com/file/xxxxx/MyDesign?node-id=1:2
Prompt Example:
Implement this Figma design as a React component:
[Paste Figma link]

Requirements:
- Use TypeScript
- Style with Tailwind CSS
- Responsive support
- Consider accessibility
Usage Example with Codex CLI
# Run in project directory
codex

# Prompt
/model gpt-5-codex

# Request Figma design implementation
Implement this Figma design as a React component:
[Figma link]
Use the MCP server to get design tokens and layout information.
You might communicate as follows. This is what I actually asked Codex CLI:
Since ~/.codex/config.toml already has Figma MCP server configuration and API key, explicit permission like “OK to retrieve tokens directly from Figma” helps when requesting (network usage is restricted by default, so I’ll make explicit permission requests if needed).
- When writing implementation requests, not only include the target URL like in the current chatgpt.txt, but also specify output location (e.g., src/app/components/), desired output format (component + CSS Modules + image placement…) and test requirements to speed up the flow of read→code→validation.
- If you’ve determined which resources to retrieve with MCP, note the commands to use, nodeId, and types of assets (images/JSON) you want to download together, so you won’t hesitate when querying Figma.
- Conversely, if “token already retrieved” or “using local tokens.json”, specify the path and content to start work immediately without network access.
- Since it’s sufficient to place common settings in .codex like this time, this style is fine going forward. If there are additional notes, add them to chatgpt.txt and I’ll read them.
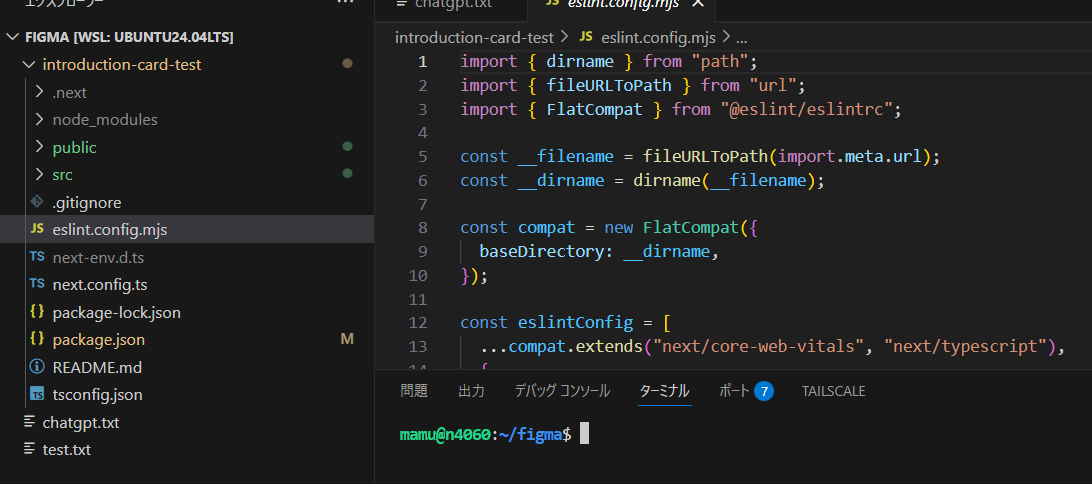
chatgpt.txt Content
# Figma Design Implementation Request Template

## Goal
- Implement specified Figma node as Next.js (React) component and incorporate necessary styles and assets.

## Information to Include in Request
1. Figma link and node-id (e.g., https://www.figma.com/...&node-id=60799-137)
2. Output file location and structure example (e.g., `src/app/components/IntroductionCard.tsx`, `.module.css`, image placement destination)
3. Test/verification method (e.g., `npm run lint`, `npm run build`, browser confirmation)
4. How to obtain design tokens or layout data:
   - Whether it's OK to retrieve using Figma MCP server defined in `.codex/config.toml`
   - Or path to alternative data like local tokens.json / CSS
5. Special constraints (responsive support requirements, accessibility requirements, commenting policy, etc.)
Reference
- Figma MCP server settings are registered in
~/.codex/config.toml. - When network access is needed, approval may be requested during command execution, so stating permission policy in advance makes it smoother.
- If binary assets like images are needed, either export from Figma or provide already placed local paths.
With requests meeting the above, implementation and testing can be handled with minimal exchanges.
Actual Example
# Figma Design Implementation Request Template (Example)

## Goal
- Componentize specified Figma node in Next.js (React) and add necessary styles and assets.

## Information to Include in Request
1. Figma link and node-id:
   https://www.figma.com/design/zulHEkmFfSjlprJcoxtPCv/Material-3-Design-Kit--Community-?node-id=60799-137&t=f7VWEEISfmSKhtT0-0
2. Output file structure (example):
   - `src/app/components/IntroductionCard.tsx`
   - `src/app/components/IntroductionCard.module.css`
   - Place images under `public/images/` (follow normal Next.js procedure)
3. Test/verification method:
   - `npm run lint`
   - `npm run build`
   - Confirm `http://localhost:3000/` in browser
4. Design token/layout data retrieval:
   - OK to retrieve using Figma MCP server in `.codex/config.toml`
5. Special constraints: None

This format provides all necessary information to start work.
Example of Generated Code
🔧 Troubleshooting
Common Problems and Solutions
Problem 1: Token Shows as Invalid
Cause: Token copy error, expiration, insufficient scope
Solution:
# Regenerate token
1. Figma Settings > Security
2. "Revoke" old token
3. Generate new token
4. Update environment variable

export FIGMA_API_KEY="new token"
Problem 2: MCP Server Cannot Connect
Cause: Firewall, port conflict, Node.js version
Solution:
# Check Node.js version
node --version
# v18 or later required

# Start with specified port
npx figma-developer-mcp --port 3334 --figma-api-key=token

# Check firewall (Windows)
netsh advfirewall firewall show rule name=all | findstr 3333
Problem 3: Code Generation Not Working Well
Cause: Design complexity, unclear prompts
Solution:
- Start with Simple Components
- Single button
- Simple card
- Basic form
- Use Clear Prompts
Good example:
"Implement this button component in React.
Use Tailwind, include hover effects and click events"

Bad example:
"Make this"
- Gradually Increase Complexity
- First basic implementation
- Then styling
- Finally add features
Problem 4: Permission Denied Error
Solution:
# When installing npm globally
# Don't use sudo (recommended)
npm config set prefix ~/.npm-global
export PATH=~/.npm-global/bin:$PATH

# If still doesn't work, use npx
npx @anthropic-ai/claude-code
What About Paid Version?
“Paid ≠ REST write access”. REST API is basically “read-only” (only some features like comments can be written). Adding/moving/editing design content is not possible with REST, and requires Figma Plugin API (executed within editor) + edit permissions (Editor seat).
Recommended Implementation Flow (Free Token OK)
- Confirm /design (or /file) link + node-id (replace
1-2→1:2). - Export required assets with Images API (PNG/SVG/WebP).
- Retrieve text/font/color/position/auto-layout with Files/Nodes API.
- Map retrieved information to React + Tailwind (replace fixed positions with auto-layout where possible).
- Place images in
/publicor load CDN/direct links withnext/image. - Finish with responsive (map Figma’s Auto Layout → Flex/Grid).
Minimal Template (Example)
// app/toc/page.tsx
import Image from "next/image";

export default function Toc() {
  return (
    <main className="min-h-screen bg-stone-100 flex items-center justify-center p-8">
      <section className="max-w-5xl w-full grid grid-cols-12 gap-8 items-start">
        <h1 className="col-span-12 text-5xl font-semibold tracking-tight">
          Table of Contents
        </h1>

        <div className="col-span-5">
          <div className="rounded-xl overflow-hidden shadow">
            <Image
              src="/images/mamu-avatar.png" // ← Asset exported from Images API
              alt="Mamu Minokamo"
              width={640}
              height={640}
            />
          </div>
          <p className="mt-3 text-xl">Mamu Minokamo</p>
        </div>

        <ol className="col-span-7 space-y-6 text-4xl leading-snug">
          <li>Exposition</li>
          <li>Rising action</li>
          <li>Climax</li>
          <li>Falling action</li>
          <li>Resolution</li>
        </ol>
      </section>
    </main>
  );
}
Important Notes
- Font replacement (Figma-only fonts → web fonts).
- Overuse of absolute positioning causes layout breaks. Better to shift Auto Layout→Flex.
- Images are direct links or
/public. Cannot use Figma view URLs. - Manage token with environment variables (
.env, etc.). Don’t hardcode in public repos.
Original images pasted should ultimately be replaced with stable URLs placed on your server or /public. (For development only, you can temporarily use Figma API “temporary URLs” but they expire)
3 Realistic Approaches
1) Production (Recommended): Export and Stable Hosting
- Export images from Figma (PNG/JPG/SVG) → a) Save to Next.js
/public/images/...and usesrc="/images/..."b) Or upload to WordPress media or your CDN and use direct link - Filename should be ASCII, no spaces (e.g.,
mamu-avatar.png)
import Image from "next/image";
export default function Hero() {
  return <Image src="/images/mamu-avatar.png" alt="Mamu" width={640} height={640} />;
}
If using WP or CDN direct links, add allowed domains to
next.config.js
// next.config.js
module.exports = {
  images: {
    remotePatterns: [
      { protocol: 'https', hostname: 'minokamo.tokyo' },
      { protocol: 'https', hostname: 'vibelsd.com' },
    ]
  }
}
2) Alternative: Place on GitHub Raw, etc.
- Put images in repository and use Raw URL
- Avoid images that are too large (recommend within several MB)
images: {
  remotePatterns: [{ protocol: 'https', hostname: 'raw.githubusercontent.com' }]
}
3) Development Only: Temporary URLs from Figma Images API
- Assuming immediate expiration. Convenient for temporary links in debugging or initial implementation
curl -H "X-Figma-Token: $FIGMA_API_KEY" \
  "https://api.figma.com/v1/images/<file_key>?ids=<node_id>&format=png"
# Temporarily put url from returned JSON into <Image src="...">
- If using, allow S3/figma image domain in
next.config.js(※Not for production as it expires)
images: {
  remotePatterns: [
    { protocol: 'https', hostname: 's3-us-west-2.amazonaws.com' },
    { protocol: 'https', hostname: 'images.figma.com' }, // Match actual output domain
  ]
}
Instructions for Agent (Can Paste Directly)
Export
<file_key>‘s<node_id>from Figma with Images API at PNG 2x, save to repository’spublic/images/mamu-avatar.png. In component, use<Image src="/images/mamu-avatar.png" width={640} height={640} />, don’t use remote references. If there’s a mask, adduse_absolute_bounds=truefor export. If using remote URL, add corresponding domain tonext.config.js.
Small Operation Tips
- Use SVG as-is if possible (icons, etc.) → Super stable by placing inline/
/publicas-is - Avoid Japanese filenames (avoid URL encoding hassle and tool compatibility issues)
- Direct link check: Open in incognito window to verify only image displays & HTTP 200/
Content-Type: image/*
🚀 Advanced: More Sophisticated Usage
Automatic Design System Generation
# Run in Claude Code
claude

# Prompt
"Generate a complete React component library from this Figma design system.
Include Storybook stories as well."
CI/CD Pipeline Integration
# .github/workflows/design-sync.yml
name: Sync Figma Design
on:
  schedule:
    - cron: '0 0 * * *'  # Run daily
jobs:
  sync:
    runs-on: ubuntu-latest
    steps:
      - uses: actions/checkout@v2
      - name: Setup Node
        uses: actions/setup-node@v2
      - name: Generate Components
        env:
          FIGMA_API_KEY: ${{ secrets.FIGMA_API_KEY }}
        run: |
          npx figma-developer-mcp --sync
Multi-Framework Support
// config.js
module.exports = {
  frameworks: ['react', 'vue', 'svelte'],
  styling: ['tailwind', 'styled-components', 'css-modules'],
  typescript: true,
  generateTests: true
};
📊 Comparison: Paid vs Free Solution
| Feature | Figma Official (Paid) | Community Version (Free) |
|---|---|---|
| Price | $15/month~ | Completely Free |
| MCP Support | ✅ | ✅ |
| Personal Access Token | ✅ | ✅ |
| Code Generation | ✅ | ✅ |
| Design Token Extraction | ✅ | ✅ |
| Update Frequency | Regular | Community-dependent |
| Support | Official Support | Community Support |
| Setup Difficulty | Easy | Bit More Work (Solved in This Article) |
🎉 Summary and Next Steps
What We Achieved
✅ Built environment to use MCP on Figma’s free plan
✅ Authentication setup with Personal Access Token
✅ MCP integration in both Claude Code and Codex CLI
✅ Realized actual code generation from design
Next Steps
- Apply to Real Projects
- Migrate UI components of existing projects
- Build design system for new projects
- Team Introduction
- Deploy to team members
- Create shared configuration files
- Customization
- Develop custom MCP server
- Integrate with internal design system
Community and Resources
- GitHub Issues: Report problems and share solutions
- Discord: Real-time support
- Documentation:
🙏 Final Words
We’ve proven that the power of open source can counter corporate lock-in strategies. With this method, anyone can realize cutting-edge AI-assisted development for free.
If this article was helpful:
- ⭐ Please star on GitHub
- 🔄 Share on social media
- 💬 Improvement suggestions and feedback welcome
Acknowledgments
This project was realized through open source community contributions:
- Anthropic (open-sourcing MCP)
- figma-developer-mcp developers
- Contributors worldwide
Version: 1.0.0 Last Updated: September 2025 License: MIT
This article is regularly updated. Check the GitHub repository for latest information.