Running macOS on Ubuntu 24.04 Desktop: A Comprehensive Guide
Introduction and Hardware Requirements
If you’ve ever wanted to experience macOS without purchasing Apple hardware, virtualization offers an excellent alternative. This guide walks you through setting up macOS on Ubuntu 24.04 using QEMU/KVM virtualization. We’ll be following the well-maintained OSX-KVM GitHub project as our reference.
Checking Hardware Compatibility
Before beginning, it’s essential to verify that your system supports hardware virtualization, which significantly improves performance. Your CPU must support either Intel VT-x or AMD SVM technology.
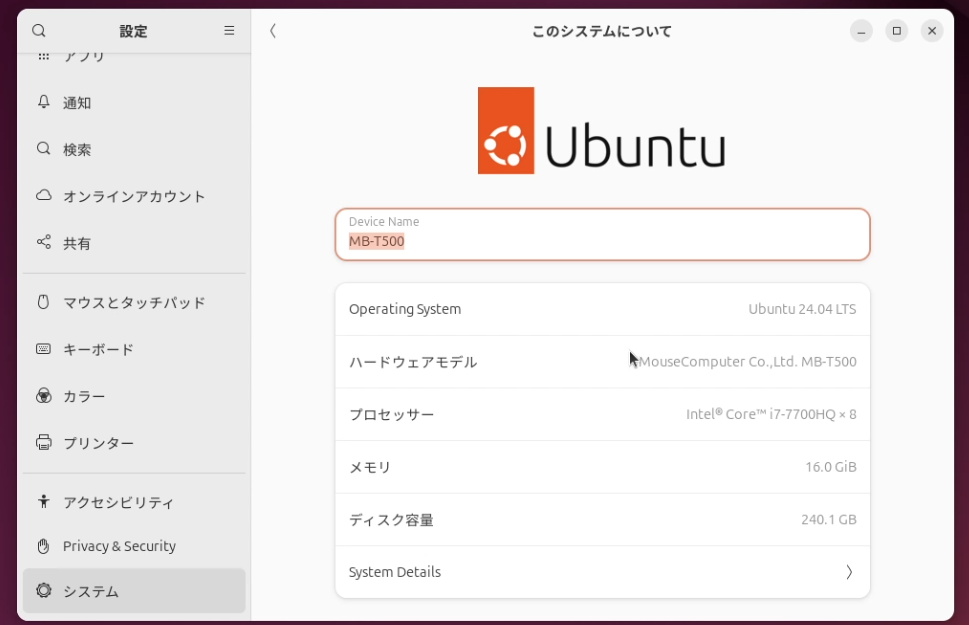
In our test environment, we’re using:
- Intel Core i7-7700HQ (8 cores)
To check if your system supports virtualization, run the following command:
grep -e vmx -e svm /proc/cpuinfo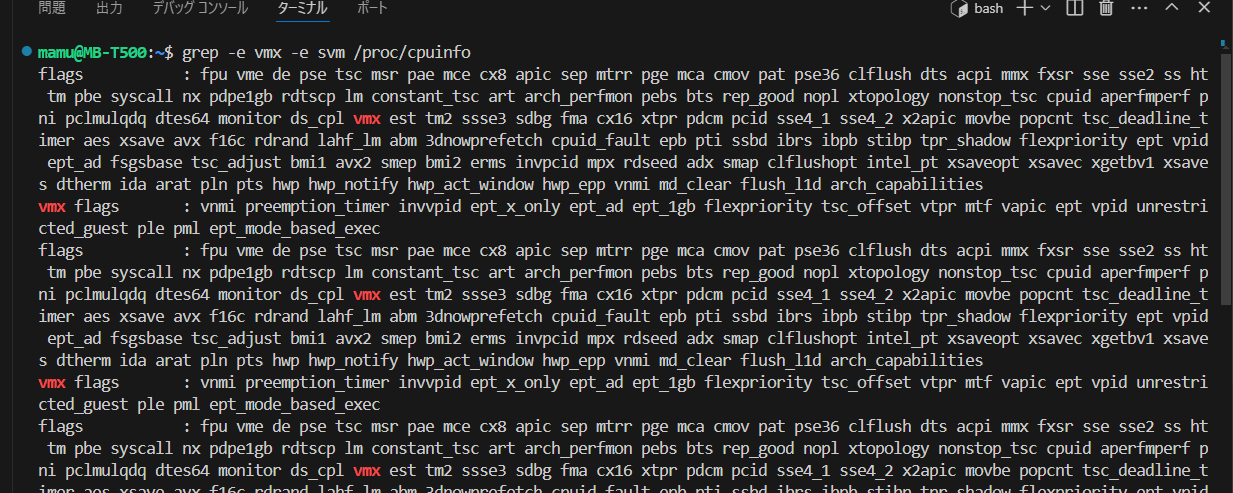
If your output contains “vmx” (for Intel processors) or “svm” (for AMD processors), hardware virtualization is enabled on your system. If these flags don’t appear, you’ll need to:
- Enter your BIOS/UEFI settings (typically by pressing F2, Delete, or F12 during boot)
- Look for options related to “Virtualization Technology,” “Intel VT-x,” “AMD-V,” or “SVM Mode”
- Enable these settings
- Save changes and reboot your computer
Hardware virtualization provides several significant benefits:
- Dramatically improved performance: Virtual machines run much faster with direct hardware access
- Reduced overhead: Less resource consumption compared to software-only virtualization
- Advanced features: Support for nested virtualization and enhanced security options
Installing QEMU and Required Dependencies
Now that we’ve confirmed hardware virtualization support, let’s install QEMU (Quick EMUlator), which will serve as our virtualization platform.
First, let’s try installing QEMU with the basic command:
sudo apt install qemuHowever, you might encounter this error:
Loading package list... Done
Creating dependency tree... Complete
Reading status information... Complete
Package qemu is not available, but is referenced by another package.
This means that the package is missing, obsolete, or only available from another source.

E: Package 'qemu' has no installation candidates
This is because Ubuntu 24.04 requires a more specific package name. The correct installation command is:
sudo apt install qemu-systemNext, we need to install several additional dependencies required for the OSX-KVM project:
sudo apt-get install uml-utilities virt-manager git \
    wget libguestfs-tools p7zip-full make dmg2img tesseract-ocr \
    tesseract-ocr-eng genisoimage vim net-tools screen -y
Note that packages already installed on your system won’t be reinstalled; apt will only add the missing components.
Cloning the OSX-KVM Repository
With the dependencies installed, it’s time to clone the OSX-KVM repository from GitHub:
cd ~
git clone --depth 1 --recursive https://github.com/kholia/OSX-KVM.git
cd OSX-KVM
Let’s break down these commands:
cd ~– Changes to your home directorygit clone --depth 1 --recursive https://github.com/kholia/OSX-KVM.git– Clones the repository- The
--depth 1option creates a shallow clone, downloading only the latest version - The
--recursiveoption ensures all submodules are also cloned
- The
cd OSX-KVM– Navigates into the newly cloned directory
Configuring KVM
Now, we need to load and configure the KVM module in the kernel:
sudo modprobe kvm
echo 1 | sudo tee /sys/module/kvm/parameters/ignore_msrs
These commands do the following:
sudo modprobe kvm– Loads the KVM (Kernel-based Virtual Machine) module into the Linux kernelecho 1 | sudo tee /sys/module/kvm/parameters/ignore_msrs– Sets theignore_msrsparameter to 1- This tells KVM to ignore access to undefined Model-Specific Registers (MSRs)
- This setting is crucial for running macOS in a virtual environment
For Intel processors, we should also copy the provided KVM configuration file:
sudo modprobe kvm
echo 1 | sudo tee /sys/module/kvm/parameters/ignore_msrs
The contents of this file configure important KVM settings:
options kvm_intel nested=1
options kvm_intel emulate_invalid_guest_state=0
options kvm ignore_msrs=1 report_ignored_msrs=0
These settings:
- Enable nested virtualization (running VMs inside VMs)
- Disable emulation of invalid guest states for better performance
- Configure how KVM handles MSRs for improved compatibility with macOS
Setting Up User Permissions
For seamless operation of virtual machines, we need to add our user account to several system groups:
sudo usermod -aG kvm $(whoami)
sudo usermod -aG libvirt $(whoami)
sudo usermod -aG input $(whoami)
Let’s understand what each command does:
sudo usermod -aG kvm $(whoami)- Adds your current user to the
kvmgroup - The
kvmgroup has special privileges for virtual machine management - The
$(whoami)command automatically inserts your username
- Adds your current user to the
sudo usermod -aG libvirt $(whoami)- Adds your user to the
libvirtgroup - The
libvirtgroup has permissions to use the libvirt virtualization API - This allows you to manage virtual machines without superuser privileges
- Adds your user to the
sudo usermod -aG input $(whoami)- Adds your user to the
inputgroup - The
inputgroup has access to system input devices - This is necessary for proper keyboard and mouse interaction with the VM
- Adds your user to the
Note: After adding your user to these groups, you may need to log out and log back in for the changes to take effect.
Downloading macOS
Now we’ll download the macOS installation files using the script provided in the OSX-KVM repository:
./fetch-macOS-v2.pyThis script will display a menu of available macOS versions. While the original guide recommended option 6 (macOS Ventura), newer versions are now available:
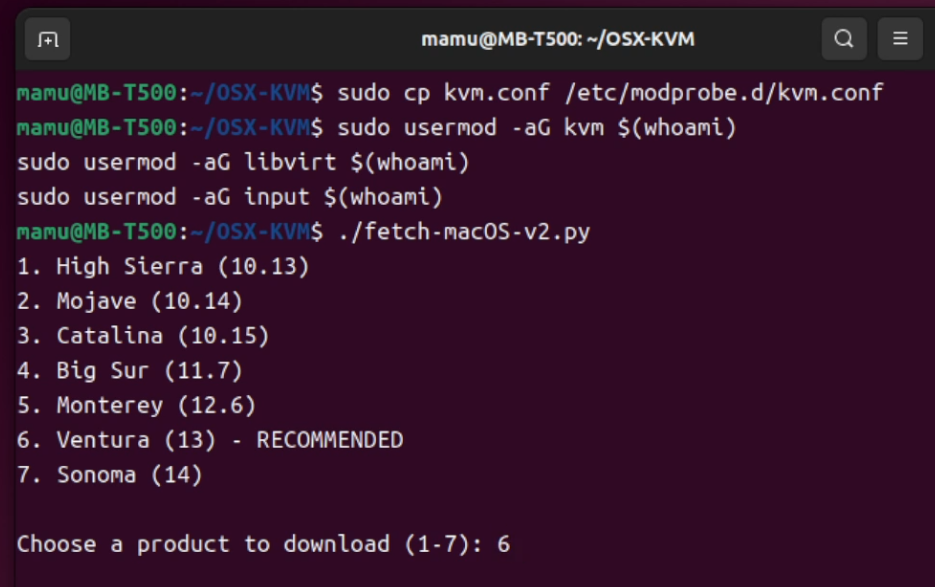
- macOS Sonoma (14.x) – Released in 2023
- macOS Sequoia (15.x) – Expected release in late 2024
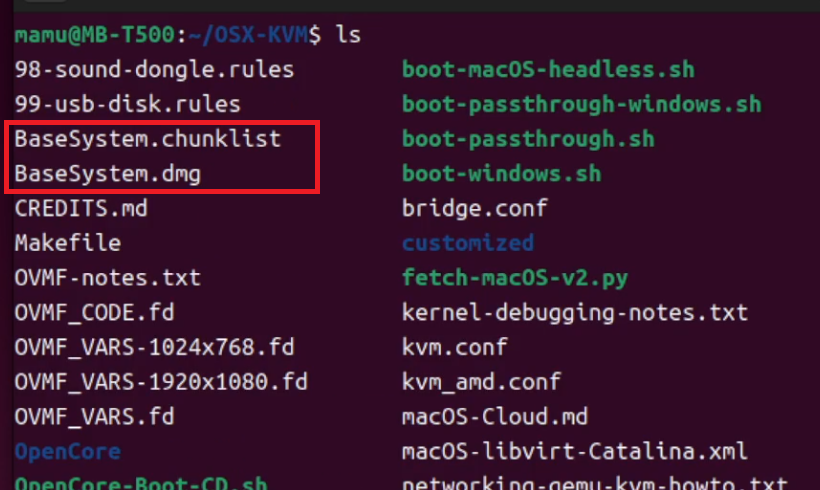
Select your preferred version from the menu. The script will download a .dmg file, which is Apple’s disk image format.
Pro Tip: Newer macOS versions will have the latest features but may have more compatibility issues in a virtualized environment. If you’re looking for stability, consider using an older version like Ventura or Monterey.
Preparing Disk Images
Since QEMU cannot directly use .dmg files, we need to convert the downloaded file to an .img format:
dmg2img -i BaseSystem.dmg BaseSystem.imgThis converts the macOS base system disk image to a format QEMU can use.
Next, we need to create a virtual hard disk for our macOS installation:
qemu-img create -f qcow2 mac_hdd_ng.img 256GBreaking down this command:
qemu-img– QEMU’s disk image manipulation utilitycreate– The action to perform (creating a new disk image)-f qcow2– Specifies the QEMU Copy-On-Write version 2 formatmac_hdd_ng.img– The name of our virtual disk file256G– Sets the maximum size to 256 gigabytes
The qcow2 format has several advantages:
- Space efficiency: It uses sparse allocation, meaning the file only grows as data is written
- Snapshot support: Allows for taking VM snapshots without duplicating the entire disk
- Compression: Supports transparent compression to save disk space
- Encryption: Can be encrypted for additional security
Despite setting a maximum size of 256GB, the disk image initially occupies only a few megabytes on your physical drive and will grow dynamically as macOS is installed and used.
Booting and Running macOS
After preparing the disk images, we’re ready to boot our macOS virtual machine. The OSX-KVM project uses OpenCore as a bootloader, which is launched via a provided script:
./OpenCore-Boot.shThis script configures QEMU with the appropriate parameters and launches the virtual machine. When you run it for the first time, you’ll see the OpenCore boot menu, followed by the macOS installation screen.
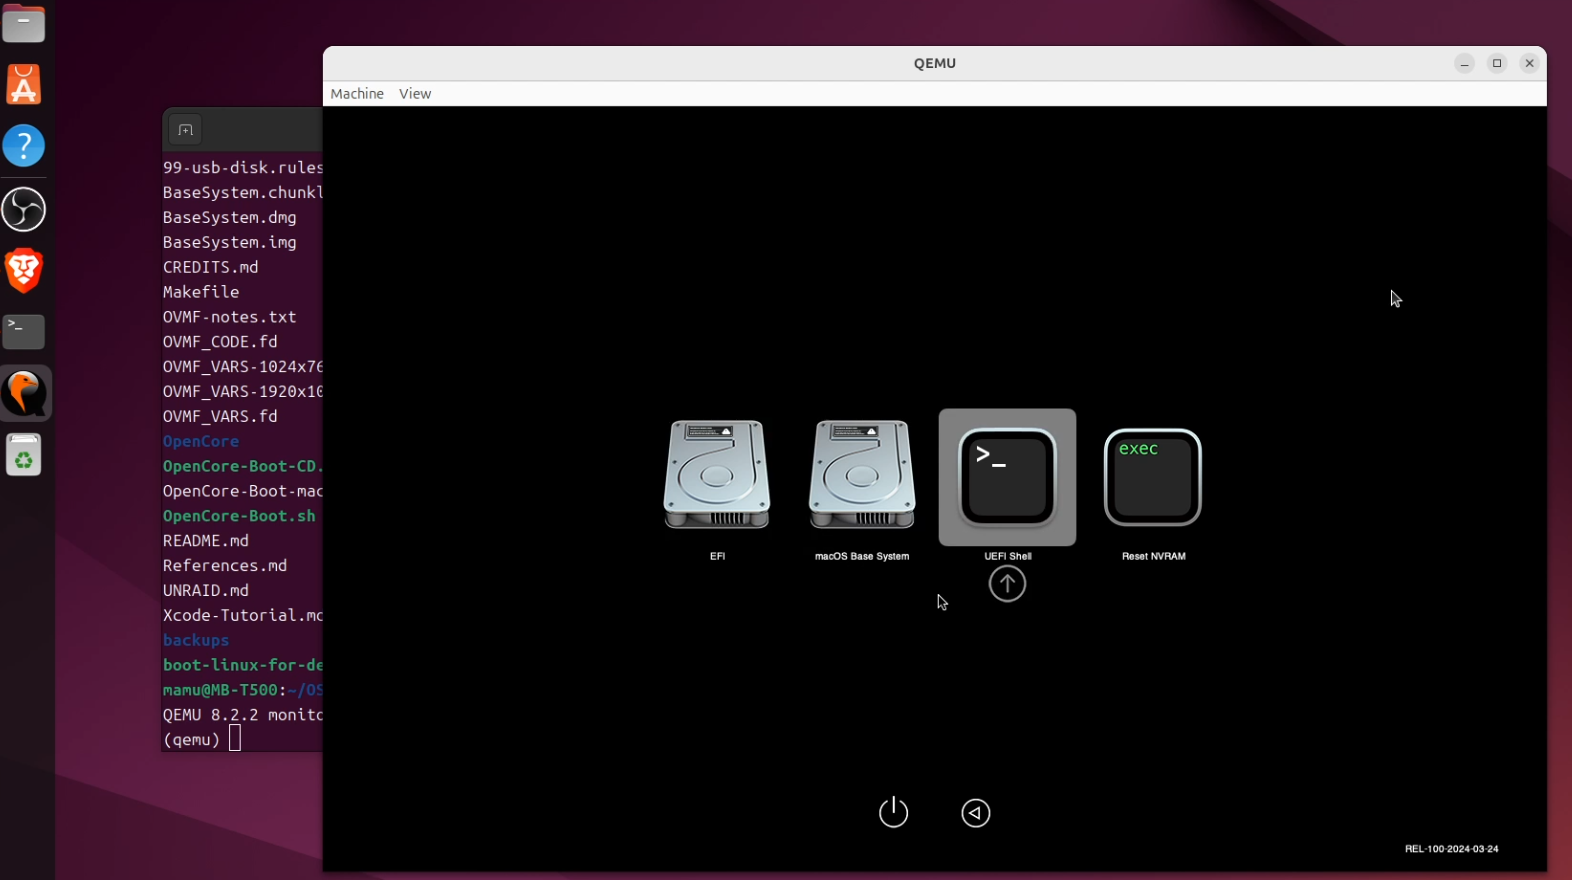
Important: The initial boot process may take several minutes, and the screen might appear frozen at times. This is normal behavior when booting macOS in a virtual environment.
The installation process is similar to installing macOS on physical Apple hardware. You’ll need to:
- Use Disk Utility to format the virtual disk
- Install macOS on the formatted disk
- Complete the setup process, including creating a user account
QEMU vs. Other Virtualization Solutions
QEMU with KVM accomplishes the same fundamental goal as VMware or VirtualBox: creating and running virtual machines on physical hardware. While these tools share many core concepts, they each have unique features and benefits.
Common Features Across All Virtualization Platforms
- Virtual Machine Management
- All tools provide virtual hardware to create VMs and run different operating systems
- Support for allocating CPU cores, memory, and other resources
- Virtual device management (disks, network adapters, etc.)
- Disk Image Support
- Use of ISO files for operating system installation
- Support for various disk image formats (.img, .vmdk, .vdi, etc.)
- Virtual disk creation and management
- Resource Allocation
- Configurable CPU, memory, and storage settings
- Network configuration options
- USB device passthrough
- State Management
- Snapshots and state saving
- VM suspension and resumption
- Backup and restoration capabilities
QEMU’s Unique Advantages
- Exceptional Flexibility
- Supports a wide range of system architectures (x86, ARM, RISC-V, PowerPC, etc.)
- Highly customizable with extensive command-line options
- Can emulate virtually any hardware component
- Open Source Benefits
- Free and open-source software (FOSS)
- Community-driven development and support
- No licensing costs or restrictions
- Transparent codebase for security review
- KVM Integration
- When paired with KVM on Linux, provides near-native performance
- Efficient hardware acceleration
- Lower overhead compared to other virtualization solutions
- Advanced Features
- Live migration of running VMs
- Extensible through plugins and scripts
- Integration with libvirt for standardized management
Final Notes and Troubleshooting
Performance Optimization
For the best performance when running macOS in QEMU:
- Allocate at least 4 CPU cores to the VM
- Provide 8GB or more of RAM
- Use an SSD for storing VM disk images
- Enable CPU and GPU passthrough if possible
Common Issues and Solutions
- Black Screen After Boot
- Try adding the
-voption to see verbose boot logs - Check GPU configuration in OpenCore settings
- Try adding the
- Slow Performance
- Verify KVM acceleration is enabled
- Check CPU and memory allocation
- Increase virtual disk performance with cache settings
- Network Connection Problems
- Try different network adapter types in QEMU
- Check firewall settings on the host system
For a visual guide to this process, you can refer to our YouTube tutorial: https://youtu.be/qLfOqJme4DA
Conclusion
Running macOS on Ubuntu 24.04 through QEMU/KVM provides a viable alternative to purchasing Apple hardware, especially for testing, development, or educational purposes. While performance won’t match native hardware, modern CPU virtualization extensions make the experience surprisingly usable.
The OSX-KVM project continues to be actively maintained, with regular updates to support the latest macOS versions. For the most up-to-date information, always check the official GitHub repository.
Have you successfully installed macOS using this guide? What has your experience been like? Feel free to share in the comments below!
