Introduction: Why Upgrade?
When you start Windows PowerShell 5.1, you will now see the following message:
Windows PowerShell
Copyright (C) Microsoft Corporation. All rights reserved.

Install the latest PowerShell for new features and improvements! https://aka.ms/PSWindows
Microsoft recommends migrating to the new PowerShell 7 for access to new features and improvements.
Key Changes (2020-Present)
Two Versions of PowerShell
Currently, there are two types of PowerShell available in Windows:
- Windows PowerShell 5.1 (Legacy version)
- Comes standard with Windows; development has ended, only security updates
- Executable file:
powershell.exe - Installation location:
C:\Windows\System32\WindowsPowerShell\v1.0\
- PowerShell 7.x (Modern version)
- Cross-platform support, actively under development
- Executable file:
pwsh.exe - Installation location:
C:\Program Files\PowerShell\7\
Latest Version Information
- PowerShell 7.5: Latest stable version
- PowerShell 7.4: LTS (Long-Term Support) version
- PowerShell 7.6-preview: Preview version (under development)
How to Check Your Current PowerShell Version
Step 1: Start Windows PowerShell
- Press the “Windows” key on your keyboard
- Type “powershell”
- Click on “Windows PowerShell” that appears
Step 2: Check the Version
Enter the following command and press Enter:
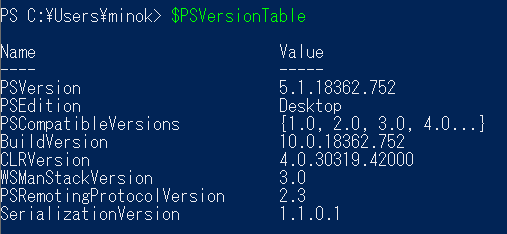
$PSVersionTable
Example output (Windows PowerShell 5.1):
Name                           Value
----                           -----
PSVersion                      5.1.19041.4894
PSEdition                      Desktop
PSCompatibleVersions           {1.0, 2.0, 3.0, 4.0...}
BuildVersion                   10.0.19041.4894
CLRVersion                     4.0.30319.42000
WSManStackVersion              3.0
PSRemotingProtocolVersion      2.3
SerializationVersion           1.1.0.1
How to Install PowerShell 7 (3 Methods)
Method 1: winget (Recommended and Easiest)
winget is a package manager that comes standard with Windows 11 and recent Windows 10 versions.
Procedure:
Start Windows PowerShell with Administrator Privileges
- Type “powershell” in the start menu
- Right-click on “Windows PowerShell”
- Select “Run as administrator”
Check for Available Versions
winget search Microsoft.PowerShell
Example output:
Name               ID                           Version Source
---------------------------------------------------------------------
PowerShell         Microsoft.PowerShell         7.5.2.0 winget
PowerShell Preview Microsoft.PowerShell.Preview 7.6.0.4 winget
Install PowerShell 7
To install the latest version:
winget install --id Microsoft.PowerShell --source winget
To install a specific LTS version:
winget install --id Microsoft.PowerShell --version 7.4.11
Check the Installation Progress
- Downloading and installation will proceed automatically
- Installation is complete when “Installation was successful” is displayed
Method 2: MSI Installer (For Servers and Corporate Environments)
The MSI installer provides full control over the installation process, ideal for server and corporate environments.
Procedure:
- Access the GitHub Releases Page
- Navigate to https://github.com/PowerShell/PowerShell/releases
- Look for the latest version (marked as “Latest”)
- Download the Appropriate InstallerSelect according to your system:
- 64-bit Windows:
PowerShell-7.5.2-win-x64.msi - 32-bit Windows:
PowerShell-7.5.2-win-x86.msi - ARM version Windows:
PowerShell-7.5.2-win-arm64.msi
- Go to “Settings” → “System” → “About”
- Check “System type”
- 64-bit Windows:
- Run the Downloaded MSI File
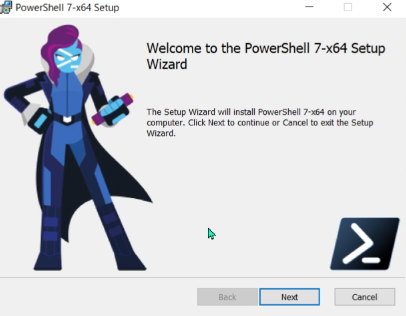
- Installation Wizard Stepsa. Welcome Screen
- Click “Next”
- Check “I accept the terms in the License Agreement”
- Click “Next”
- Default:
C:\Program Files\PowerShell\7\ - Click “Next” if no change is needed
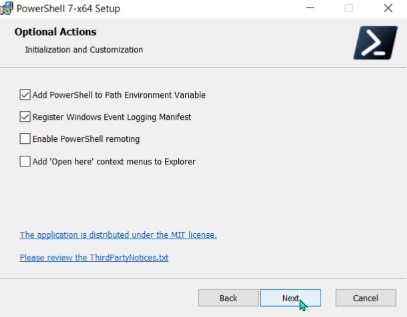
- ✅ Add PowerShell to Path Environment Variable
- ✅ Register Windows Event Logging Manifest
- ✅ Enable PowerShell remoting
- ✅ Add ‘Open here’ context menus to Explorer
- ✅ Add ‘Run with PowerShell 7’ context menu for PowerShell files
- Click “Install”
- If prompted for administrator privileges, select “Yes”
- Click “Finish”
Method 3: Microsoft Store (Easiest but with Limitations)
Procedure:
- Open the Microsoft Store
- Start “Microsoft Store” from the start menu
- Search for PowerShell
- Enter “PowerShell” in the search box
- Install
- Select “PowerShell” (published by Microsoft)
- Click “Get” or “Install”
Post-Installation Confirmation and Initial Settings
Installation Confirmation
Start the New PowerShell 7
- Search for “pwsh” or “PowerShell 7” in the start menu
- The one with the black background icon is PowerShell 7
Check the Version
$PSVersionTable
Example output:
Name                           Value
----                           -----
PSVersion                      7.5.2
PSEdition                      Core
GitCommitId                    7.5.2
OS                             Microsoft Windows 10.0.22631
Platform                       Win64
PSCompatibleVersions           {1.0, 2.0, 3.0, 4.0…}
PSRemotingProtocolVersion      2.3
SerializationVersion           1.1.0.1
WSManStackVersion              3.0
Settings in Windows Terminal (Recommended)
If you are using Windows Terminal, you can set PowerShell 7 as the default:
- Open Windows Terminal Settings
- Start Windows Terminal
- Press “Ctrl + ,” or click the down arrow next to the tab → “Settings”
- Change the Default Profile
- Navigate to “Startup” → “Default profile”
- Select “PowerShell” (pwsh.exe) from the dropdown
- Click “Save”
Hide the Startup Message (Optional)
If you want to hide the startup message for Windows PowerShell 5.1, you can use the -NoLogo option:
For Windows Terminal:
- Open settings (settings.json)
- Find the Windows PowerShell profile
- Change the command line as follows:
"commandline": "powershell.exe -NoLogo"
About the Coexistence of PowerShell 7 and 5.1
PowerShell 7 is designed to run alongside Windows PowerShell 5.1.
Points for Using Them Separately
When to use PowerShell 7:
- Creating new scripts
- Cross-platform support is required
- Want to use the latest features
- Performance is a priority
When to use Windows PowerShell 5.1:
- Compatibility with legacy scripts is required
- Using specific Windows management modules
- Active Directory management, etc.
Differences in Executable Files
# Start Windows PowerShell 5.1
powershell.exe

# Start PowerShell 7
pwsh.exe
Automatic Update Settings
PowerShell 7.2 and later support Microsoft Update and can be automatically updated through Windows Update.
Enable Microsoft Update
When installing with MSI, enable the following option:
msiexec.exe /i PowerShell-7.5.2-win-x64.msi ENABLE_MU=1
Troubleshooting
Problem 1: winget Cannot Be Used
Error message:
'winget' is not recognized as an internal or external command, operable program or batch file.
Solution:
- Update Windows through Windows Update
- Install App Installer from the Microsoft Store
- If it still doesn’t work, use the MSI installer instead
Problem 2: Execution Policy Error
Error message:
... because running scripts is disabled on this system.
Solution:
Start PowerShell with administrator privileges and run the following:
Set-ExecutionPolicy -ExecutionPolicy RemoteSigned -Scope CurrentUser
Problem 3: Legacy Modules Don’t Work
Some Windows PowerShell-specific modules have compatibility issues.
Confirmation method:
Get-Module -ListAvailable
Solution:
- Use Windows PowerShell 5.1 alongside PowerShell 7
- Enable compatibility mode:
Import-Module -UseWindowsPowerShell ModuleName
Summary
Upgrading to PowerShell 7 can be done using three straightforward methods:
- winget (easiest and recommended)
- MSI installer (for corporate environments)
- Microsoft Store (with limitations)
PowerShell 7 offers improved performance, modern features, and cross-platform support, making the upgrade worthwhile. You can run Windows PowerShell 5.1 alongside PowerShell 7, ensuring a smooth transition.
Reference Links
Last updated: September 16, 2024
The following article is from 2020 and is preserved to show how the process has evolved.
When I start PowerShell on Windows, I get a message that says “Try the new cross-platform PowerShell https://aka.ms/pscore6“, so I decided to follow the URL and install the new version.

To check the current version, enter the following command.
$PSVersionTable
I’ll navigate to the URL mentioned in the message. When the page loads, there’s a blue banner in the upper right that says “Download PowerShell”. Clicking it takes you to the GitHub download page. However, I want to read the explanation first, so I’ll click the link in the middle of the page that says “Installing PowerShell on Windows”.
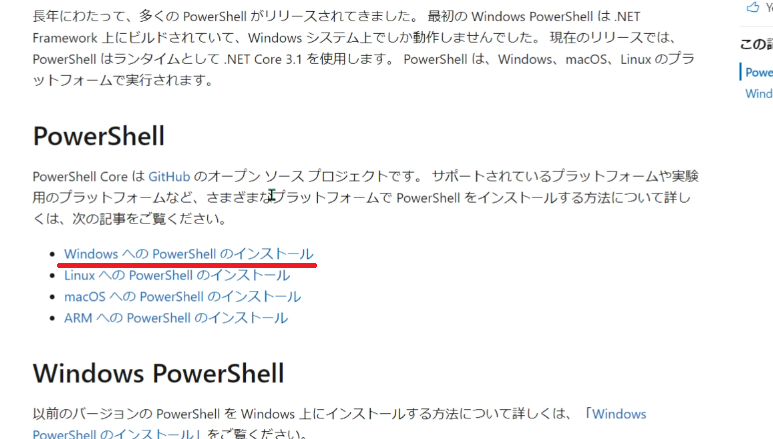
On the next page, click the “GitHub Releases” link in the “Download the installer package” section.

When you reach the GitHub page, skip the preview version at the top and scroll down to download the released version. Before coming to GitHub, the “Install MSI package” section on the Microsoft page specified the file name format as:
PowerShell-<version>-win-<os-arch>.msi
So I’ll download “PowerShell-7.0.3-win-x64.msi”.

Once the download is complete, run the file and follow the instructions. For the “Optional Actions” that appear during installation, I’ll leave them at their default values and proceed.
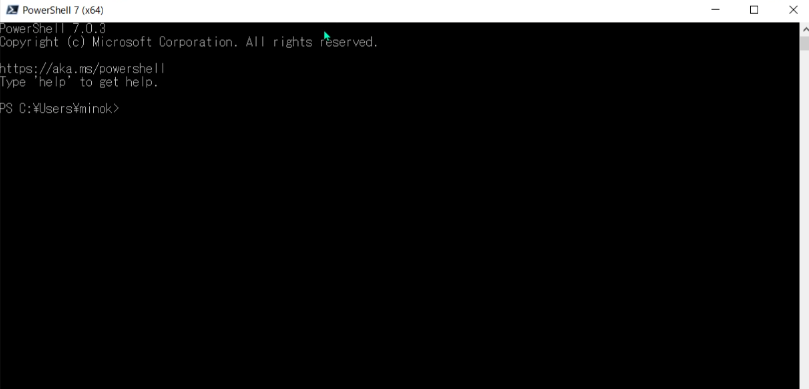
After installation completes, PowerShell 7 (x64) has been added to the start menu. The background color has changed from blue to black. The previous version remains available as well.