Install Proxmox VE on the actual device.
What is Proxmox VE?
Proxmox Virtual Environment is a Debian-based open source virtualization platform. It allows users to create and manage multiple virtual machines (VMs) and containers on physical servers. Below are the main features and benefits of Proxmox VE.
Key Features
- Open Source:.
- Proxmox VE is open source software and free to use. The source code is also publicly available and accessible to all.
- Virtualization support:.
- Both virtual machines and containers are supported using KVM (Kernel-based Virtual Machine) and LXC (Linux Containers).
- Web-based management interface: The
- An intuitive and easy-to-use web-based management interface is provided to remotely create, configure, and monitor virtual machines and containers.
- High availability and cluster management.
- Multiple Proxmox servers can be clustered to create a high availability (HA) environment, ensuring continuity of service in the event of server failure.
- Backup and Restore.
- Provides snapshot and backup capabilities for virtual machines and containers, making it easy to protect and restore data.
Benefits
- Cost-effective: 1.
- Being open source, there are no licensing costs. It is a cost-effective option for small businesses and individual users.
- Flexibility:.
- A combination of virtual machines and containers can be used to meet a variety of needs.
- Community and Support
- There is an active user community, with plenty of information available through forums and documentation. Commercial support is also available.
- Scalability: The
- Additional servers can be added as needed, and clusters can be expanded to increase system performance and capacity.
In particular, if the actual machine is equipped with a GPU, the GPU can be used in the virtual environment by pass-through the GPU to the virtual machine. the GPU pass-through feature allows for high-performance graphics processing even in a virtual environment. It can be used for game development, machine learning, video editing, and other applications on virtual machines. Download the ISO file from the official page.

Create a bootable USB drive with the ISO file using Rufus. Insert it into the actual machine you want to install Proxmox VE on. to boot from USB to install Proxmox VE, the USB drive must be set as the highest priority boot device in the BIOS or UEFI settings. Additionally, if Secure Boot is enabled, it may need to be disabled. Secure Boot can cause compatibility issues with some operating systems, so here are a few things to keep in mind when creating a bootable USB drive with Rufus. I checked because the USB created was not accessible in Windows; USB drives written in DD image mode could not be viewed in the usual way on Windows to see their contents. Additionally, the USB is recognized as two USBs when it should be one.

Specific problems and their reasons
- Invisible file system:.
- When writing in DD image mode, the USB drive has the file system of the ISO image (e.g. ext4 or other Linux file systems) intact. Windows does not recognize these file systems by default, so the files cannot be accessed.
- Recognized as multiple partitions: The
- Some ISO images may have multiple partitions; when written in DD image mode, their partition structure is also written intact, so Windows may recognize them as multiple drives.
After some research, I found the following: when writing an ISO image to USB with Rufus, you may be given the choice between “DD image mode” and “ISO image mode”. The difference between these modes is as follows
DD Image Mode
- Direct Disk Copy: This mode writes the entire ISO image directly to the USB drive.
- More generic: Useful for some special Linux distributions and BSD-like operating systems where the standard ISO image writing method does not work.
- Compatibility: Improves boot compatibility on some systems, but may not be suitable for Windows installation media.
ISO Image Mode
- File Copy: Extracts the contents of an ISO image to a USB drive and sets the boot information appropriately.
- For Windows: Suitable for writing Windows installation media and general ISO files to USB.
- Easy to use: It is recommended that most users choose this mode.
Which should you choose?
- Linux and BSD-based ISOs: Some distributions may require “DD Image Mode”. Choose this one, especially if the official documentation recommends DD image mode.
- Windows installation media: Normally, choose “ISO image mode.
If Rufus automatically selects “DD Image Mode” when writing an ISO image, it is possible that the ISO file requires writing in that mode. After all, a USB drive created in DD image mode cannot be recognized by Windows, but will work fine as a boot disk on another PC.
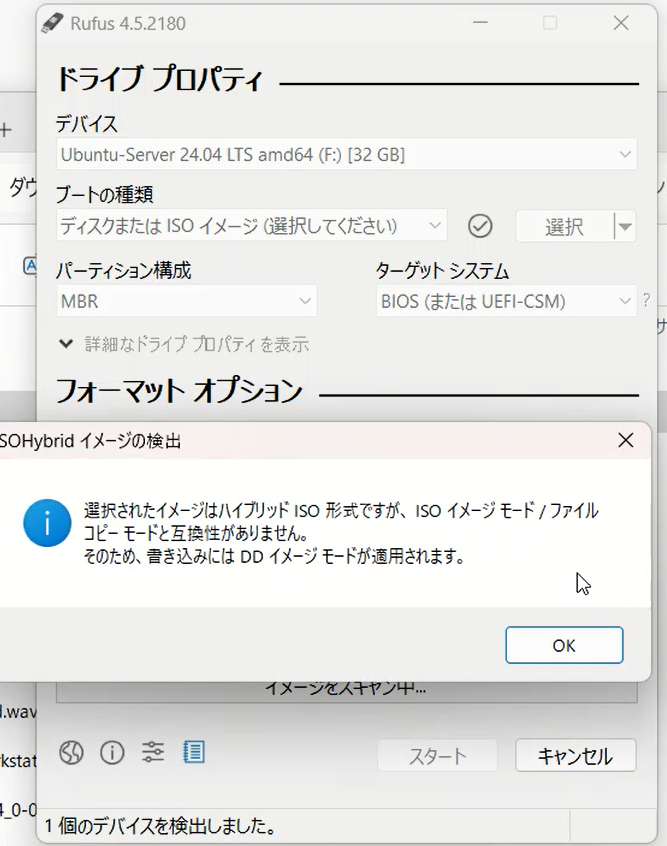
Memo.
USB drives created in DD image mode can be used to install the Proxmox Virtual Environment even though they are not recognized as a file system on Windows, since they function properly as bootable disks.
When using a wired connection, network configuration is usually easier and less troublesome; with WIFI, network configuration is required after installation of Proxmox VE. The installation process is simple and involves a wizard to guide the user through the required fields.
Items required when installing Proxmox VE
Install Location
Set your region and time zone
Password and email address (no user information is required, these are set as root)
∙ IP address, etc. (If your router functions as a DHCP (Dynamic Host Configuration Protocol) server, the IP address, gateway, and DNS server values will be automatically set appropriately during Proxmox VE installation. (Manual entry for special environments)
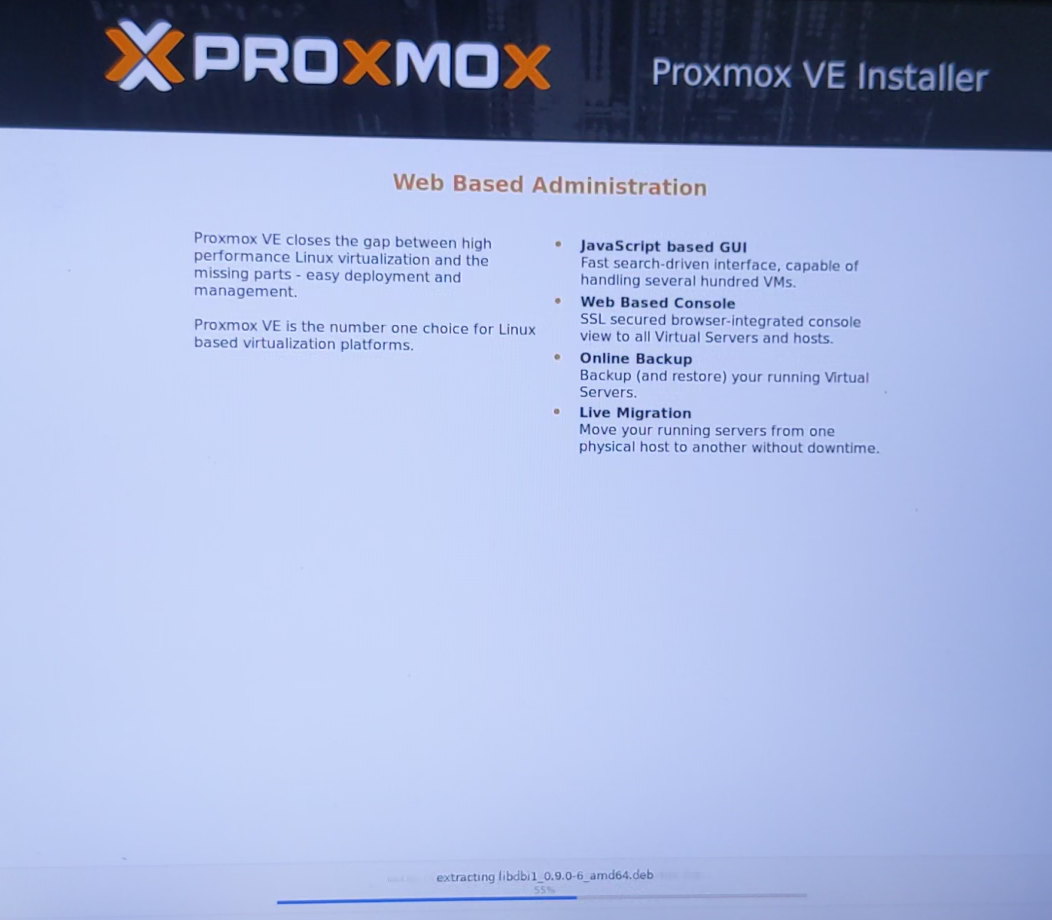
After installation is complete, access the site using a browser on another PC. The URL will be as follows HTTPS is used by default for enhanced security, even in the local environment.
https://192.168.0.139:8006
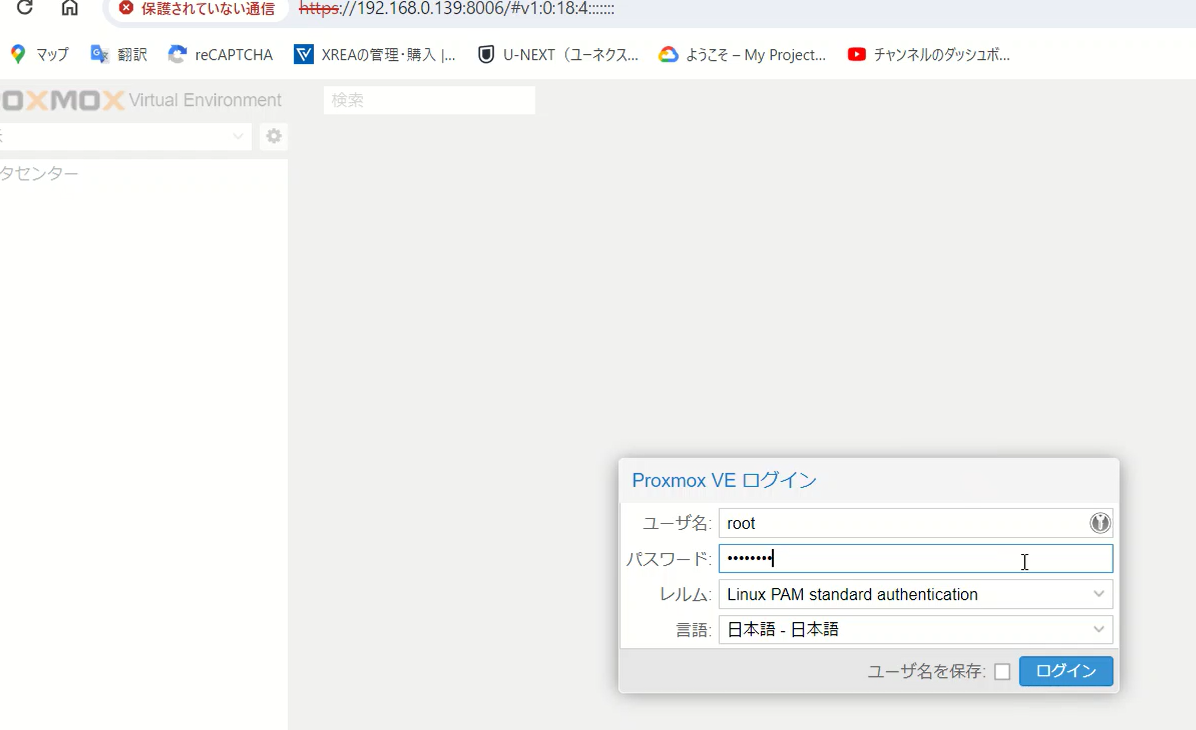
When the login screen appears, enter root for the user name and the password you set earlier to log in.After installing Proxmox VE, you may see “No active subscriptions” when logging into the web interface. This is because Proxmox VE is a subscription-based service and a subscription must be purchased to receive commercial support.

Using Proxmox VE for free
Proxmox VE is open source and can be used without a subscription, but access to commercial support and enterprise repositories is limited. Follow the steps below to set up for free use.
Change repositories in the browser window
- Log in to the Proxmox VE web interface:.
- Open a browser and access the Proxmox VE web interface.
- The URL is usually
https://<ProxmoxServer IP address>:8006
- Go to the repository configuration page:.
- From the left navigation menu, go to “Datacenter” -> “Node Name
” -> “Update” -> “Repository” tab.
- From the left navigation menu, go to “Datacenter” -> “Node Name
- Disable Enterprise Repository: Go to
- Select the
pve-enterpriserepository and click the “Disable” button above. This will disable the enterprise repository.
- Select the
- Adding a No-Subscription Repository:.
- Click the “Add” button to see the list of repositories that can be added, and select No-Subscription to add.
- Apply changes: Click on the
- Click the “Reload” button to reflect the repository. The contents displayed in the repository list will change.
I could have logged into the Proxmox VE server via SSH and changed the repository, but the browser screen was sufficient. Once added, the browser did not seem to be able to delete it, so I could use my knowledge of Linux to modify it.
The real work begins in Hoho. Create a virtual machine. This time, install FreeDos. Download it from the official site.
Unzip the file and send the ISO file to the Proxmox VE server via SSH. After the upload is complete, click the “Create VM” button in the upper right corner of the screen to configure the machine. in the ISO image section, you should be able to select the file you uploaded. I adjusted the disk space and memory size, but did not make any other changes. To check, double-click on the created virtual machine or select the virtual machine and choose the console. However, it does not boot properly.
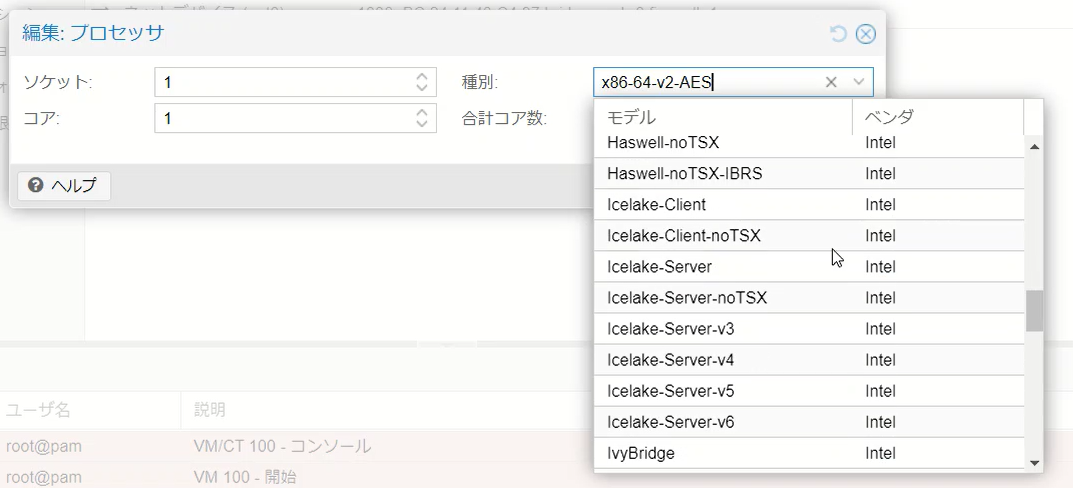
This problem was solved by changing the processor as it was x86-64-v2-AES. (e.g. Pentium or kvm64).
Also, when the installation screen appears but there is no keyboard response, uncheck “display only” in the settings.
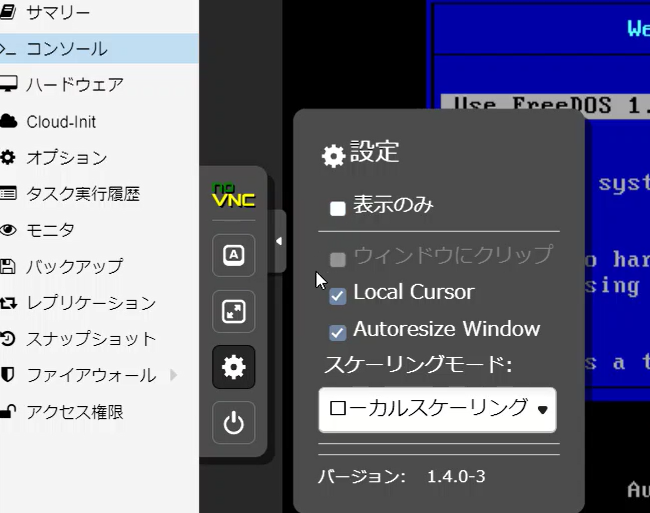
(For noVNC) Furthermore, after the first partition creation in the FreeDos installation, I have to reboot, but it does not boot from there. The reason is that it is not formatted yet. So stop the system once without rebooting. Set the order of the virtual media in which the ISO file was inserted to the first in the boot order in the options.
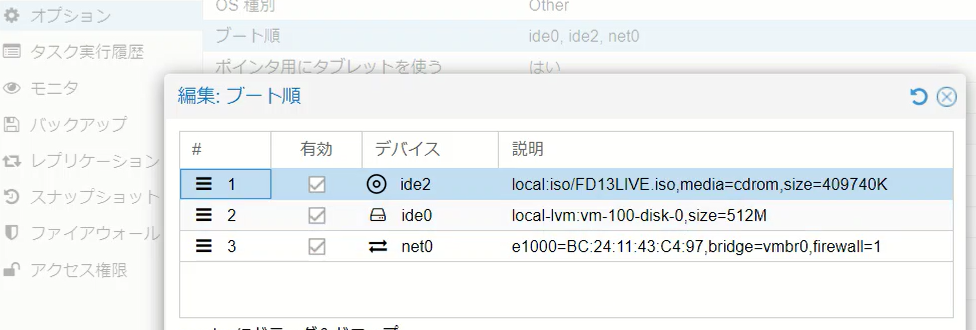
By doing this, the installation procedure is the same as before, but the installation will start after formatting. Do not reboot after the installation is complete, but do not forget to set the boot order to the virtual hard disk again this time. This can be summarized in a simple way as follows.
FreeDOS installation procedure
- Create partitions:.
- Start the FreeDOS installation and create partitions.
- Stop without rebooting: Stop without rebooting.
- The normal procedure requires a reboot, but here we stop the virtual machine once without rebooting.
- Change boot order: The normal procedure is to stop the virtual machine once without rebooting.
- Change the boot order of the virtual machine in the Proxmox VE options.
- The virtual media with the ISO file inserted is set to the highest priority.
- Resume installation:.
- Without restarting the virtual machine, change the settings and then start it again.
- Continue with the FreeDOS installation procedure and perform formatting.
- Installation complete:.
- After formatting, the installation will begin automatically.
- Once installation is complete, stop the virtual machine without rebooting.
- Re-change the boot order:.
- Change the boot order of the virtual machine again, setting the virtual hard disk as the first priority.
- Boot FreeDOS: Boot FreeDOS.
- Boot the virtual machine and confirm that FreeDOS boots normally.
How to configure networking in FreeDOS
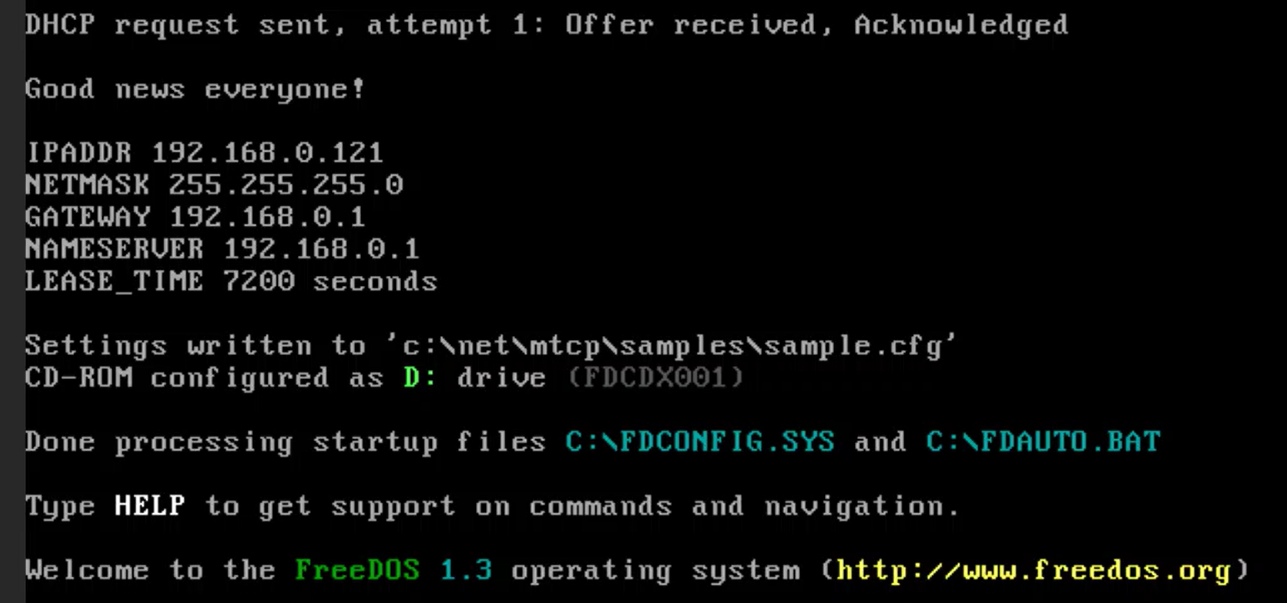
To set up a network connection in FreeDOS, you need to check the settings in FDAUTO.BAT andFDNET.BAT and use the appropriate packet driver. looking at the next part of FDAUTO.BAT, it looks like you should analyze fdnet.bat to configure it for the network. FDAUTO.BAT will configure network settings, etc. at system startup.
:FINAL
MEM /C /N
echo.
if not exist %dosdir%\bin\fdnet.bat goto NoNetwork
call %dosdir%\bin\fdnet.bat start
if errorlevel 1 goto NoNetwork
REM Custom networking stuff once packet driver has loaded
Next, check the following part of fdnet.bat. This script loads the network driver and establishes the network connection.
set _FDNET.DIR=\NETWORK\FDNET
if exist %_FDNET.DIR%\DHCP.EXE goto FoundBINS
set _FDNET.DIR=\NET\FDNET
if exist %_FDNET.DIR%\DHCP.EXE goto FoundBINS
set _FDNET.DIR=%DOSDIR%\NETWORK\FDNET
if exist %_FDNET.DIR%\DHCP.EXE goto FoundBINS
set _FDNET.DIR=%DOSDIR%\NET\FDNET
if exist %_FDNET.DIR%\DHCP.EXE goto FoundBINS
set _FDNET.DIR=%DOSDIR%\BIN\NETWORK\FDNET
if exist %_FDNET.DIR%\DHCP.EXE goto FoundBINS
set _FDNET.DIR=%DOSDIR%\BIN\NET\FDNET
if exist %_FDNET.DIR%\DHCP.EXE goto FoundBINS
set _FDNET.DIR=%DOSDIR%\BIN\NETWORK
if exist %_FDNET.DIR%\DHCP.EXE goto FoundBINS
set _FDNET.DIR=%DOSDIR%\BIN\NET
if exist %_FDNET.DIR%\DHCP.EXE goto FoundBINS
Place the packet driver rtspkt.com in one of these directories. In this case, it should be C:\NET\FDNET. In addition, create a new FDNETPD.BAT and save it in the same location. One of the directories is as follows
C:\NETWORK\FDNETC:\NETWORK\FDNETC:\NETWORK\FDNET%DOSDIR%\NET\FDNETC:\NETWORK\FDNET%DOSDIR%\BIN\NETWORK\FDNET%DOSDIR%\BIN\NET\FDNET%DOSDIR%\BIN\NETWORK%DOSDIR%\BIN\NET
The contents of FDNETPD.BAT are as follows
@ECHO OFF
C:\NET\FDNET\rtspkt.com 0x60
When the configuration is complete, reboot the system; FDAUTO.BAT will be executed and FDNET.BAT will be automatically invoked to establish the network connection. The network connection will be set up automatically when the system starts up. In addition, an IP address is likely to be assigned by the router via DHCP.
Since Proxmox VE uses a different interface and terminology from VMware and VirtualBox, there were some things that puzzled me when I first used it, so I will summarize them here.
Major items and corresponding terms in Proxmox VE
- Datacenter
- Proxmox VE: A unit that brings together all nodes (servers) and resources (storage, network, etc.) to be managed.
- VMware: Equivalent to vCenter Server, managing multiple ESXi hosts.
- VirtualBox: GUI interface to manage multiple virtual machines, although this concept does not exist.
- Node
- Proxmox VE: A physical server that hosts virtual machines and containers. Multiple nodes can be clustered and managed.
- VMware: Equivalent to an ESXi host.
- VirtualBox: Each host machine (PC with VirtualBox installed).
- Cluster
- Proxmox VE: Multiple nodes are grouped together and treated as a single management unit. It enables resource sharing and high availability.
- VMware: A cluster is equivalent to a vSphere cluster, bringing together multiple ESXi hosts to share resources.
- VirtualBox: Cluster functionality is essentially absent.
- Virtual Machine
- Proxmox VE: A complete virtualized computer system, using Kernel-based Virtual Machine (KVM).
- VMware: Virtual Machine, running on ESXi hosts.
- VirtualBox: Virtual Machine, running on VirtualBox software.
- Container
- Proxmox VE: Lightweight virtualization environment, uses LXC (Linux Containers).
- VMware: Allows containers to run inside virtual machines, but has little direct container support.
- VirtualBox: No direct container support, but can use Docker, etc. within virtual machines.
- Storage
- Proxmox VE: A place to store disk images, ISO images, and backups of virtual machines and containers. Supports local and network storage (NFS, iSCSI, Ceph, etc.).
- VMware: equivalent to a datastore. Stores disk images of virtual machines.
- VirtualBox: file on the disk of the host machine where the disk images of virtual machines are stored.
- Network
- Proxmox VE: Network configuration for virtual machines and containers. Supports bridged networks, NAT, VLANs, etc.
- VMware: management of virtual machine networks using virtual switches (vSwitch) and distributed switches (dvSwitch).
- VirtualBox: network adapter configuration (NAT, bridge, host-only, etc.).
I also installed Ubuntu 24.04 without any difficulty. Thus, Proxmox VE can be used to create a dual or triple boot-like environment.
