I’ll help you create a natural, engaging English translation of your blog post introduction that maintains the meaning while avoiding a direct translation style. Here’s my suggested English version:
The Ultimate All-in-One Voice and Music Generation Toolkit Has Arrived!
Introducing a groundbreaking toolkit that brings together the industry’s most advanced voice and music generation models in one comprehensive package. This impressive collection integrates cutting-edge technologies like Bark, MusicGen, RVC, Tortoise, MAGNeT, Demucs, Maha TTS, Stable Audio, Vocos, and MMS into a single unified platform. The toolkit also supports powerful extensions including:
- Riffusion
- AudioCraft Mac
- AudioCraft Plus
- XTTSv2
- MARS5
- F5-TTS
- Parler TTS
This innovative project delivers a wide range of features across three key categories to meet creators’ diverse needs:
- Text-to-Speech Synthesis
Featuring models capable of natural voice generation and voice cloning:
- Bark
- Tortoise
- Maha TTS
- StyleTTS2
- Vall-E X
- Parler TTS
- Audio and Music Generation
Offering powerful tools to support music creation and enable diverse sound design:
- MusicGen
- Stable Audio
- AudioCraft Mac (Extension)
- AudioCraft Plus (Extension)
- Riffusion (Extension)
- Audio Conversion and Tools
Equipped with numerous utilities for audio separation, translation, and conversion:
- RVC
- Demucs
- MAGNeT
- SeamlessM4T
- MMS
- XTTSv2 (Extension)
- MARS5 (Extension)
- F5-TTS (Extension)
Would you like me to continue with the next section? I’ve maintained the technical accuracy while making it sound natural in English, avoiding literal translation that might trigger search engine penalties.
Why Docker?
In this article, I’ll walk you through using Docker for this project. Let’s explore why Docker is such a powerful choice for voice generation tools.
Key Benefits of Using Docker
- Consistent Environment
- Runs applications in a virtualized environment
- Works identically across all operating systems
- Eliminates platform-specific issues
- Easy Dependency Management
- Handles Python, CUDA, and other dependencies automatically
- Provides a pre-configured environment
- No manual setup headaches
- Safety and Flexibility
- Keeps your host system clean and unmodified
- Easy testing of different versions
- Complete isolation between projects
- Simplified Maintenance
- Highly reproducible environments
- Easy troubleshooting
- Seamless updates without breaking existing setups
Getting Started
We’ll be following the official GitHub repository for this implementation: View GitHub Repository
Project Setup Guide
Initial Setup
First, we’ll start with WSL (Ubuntu 24.04) and copy the project to your local machine. Let’s break this down into simple steps.
Starting WSL
Launch WSL (Ubuntu 24.04) on your system. We’ll use this to copy the project to your local computer.
Cloning the GitHub Repository
To clone the repository, use this command:
git clone <repository_URL>For example, if your repository URL is https://github.com/username/repo.git, you would enter:
git clone https://github.com/username/repo.gitNavigating to the Project Directory
Once cloned, move into the project directory:
cd repoChecking Prerequisites
Before proceeding, ensure Docker and Docker Compose are installed on your system. Verify this by running:
docker --version
docker compose version
If you see version information displayed, these tools are properly installed and you’re ready to proceed.
Installing NVIDIA Container Toolkit
When using GPU-accelerated projects, you’ll need the NVIDIA Container Toolkit to access your host GPU from Docker containers. Follow these setup instructions, but note that installation methods may vary. For the most up-to-date instructions, please refer to the official documentation.
1. Verify NVIDIA Drivers
First, confirm that NVIDIA drivers are installed on your host PC. Check if your GPU is recognized by running:
nvidia-smiIf you see your GPU information displayed, you’re good to go. If not, download and install the appropriate drivers from the NVIDIA website.
2. Set Up NVIDIA Container Toolkit
Add the Repository
For WSL (Ubuntu 24.04), add the repository using:
distribution=$(. /etc/os-release;echo $ID$VERSION_ID) \
 && curl -s -L https://nvidia.github.io/nvidia-docker/gpgkey | sudo gpg --dearmor -o /usr/share/keyrings/nvidia-docker.gpg \
 && curl -s -L https://nvidia.github.io/nvidia-docker/$distribution/nvidia-docker.list | \
 sudo tee /etc/apt/sources.list.d/nvidia-docker.list
Install the Toolkit
After adding the repository, install the NVIDIA Container Toolkit:
sudo apt-get update
sudo apt-get install -y nvidia-container-toolkit
Configure Docker Daemon
Set NVIDIA runtime as Docker’s default runtime:
sudo nano /etc/docker/daemon.jsonAdd or modify the file with this configuration:
{
 "default-runtime": "nvidia",
 "runtimes": {
  "nvidia": {
   "path": "nvidia-container-runtime",
   "runtimeArgs": []
  }
 }
}
Restart the Docker daemon:
sudo systemctl restart docker3. Verify the Installation
Test if Docker can access your GPU:
docker run --rm --gpus all nvidia/cuda:12.0-base nvidia-smiIf you see your GPU information, the setup is complete!
Using GPU with Your Project
Once the NVIDIA Container Toolkit is installed, you can use GPU in your Docker containers. Use this command:
docker run --gpus all <your_docker_image>To specify a particular GPU:
docker run --gpus '"device=0"' <your_docker_image>And that’s it – you’re all set to use GPU acceleration in your Docker containers!
Setting Up the Project in WSL
Following these steps will set up the project in your WSL environment. Let’s start with the actual implementation:
git clone https://github.com/rsxdalv/tts-generation-webui.gitNext, navigate to the project directory:
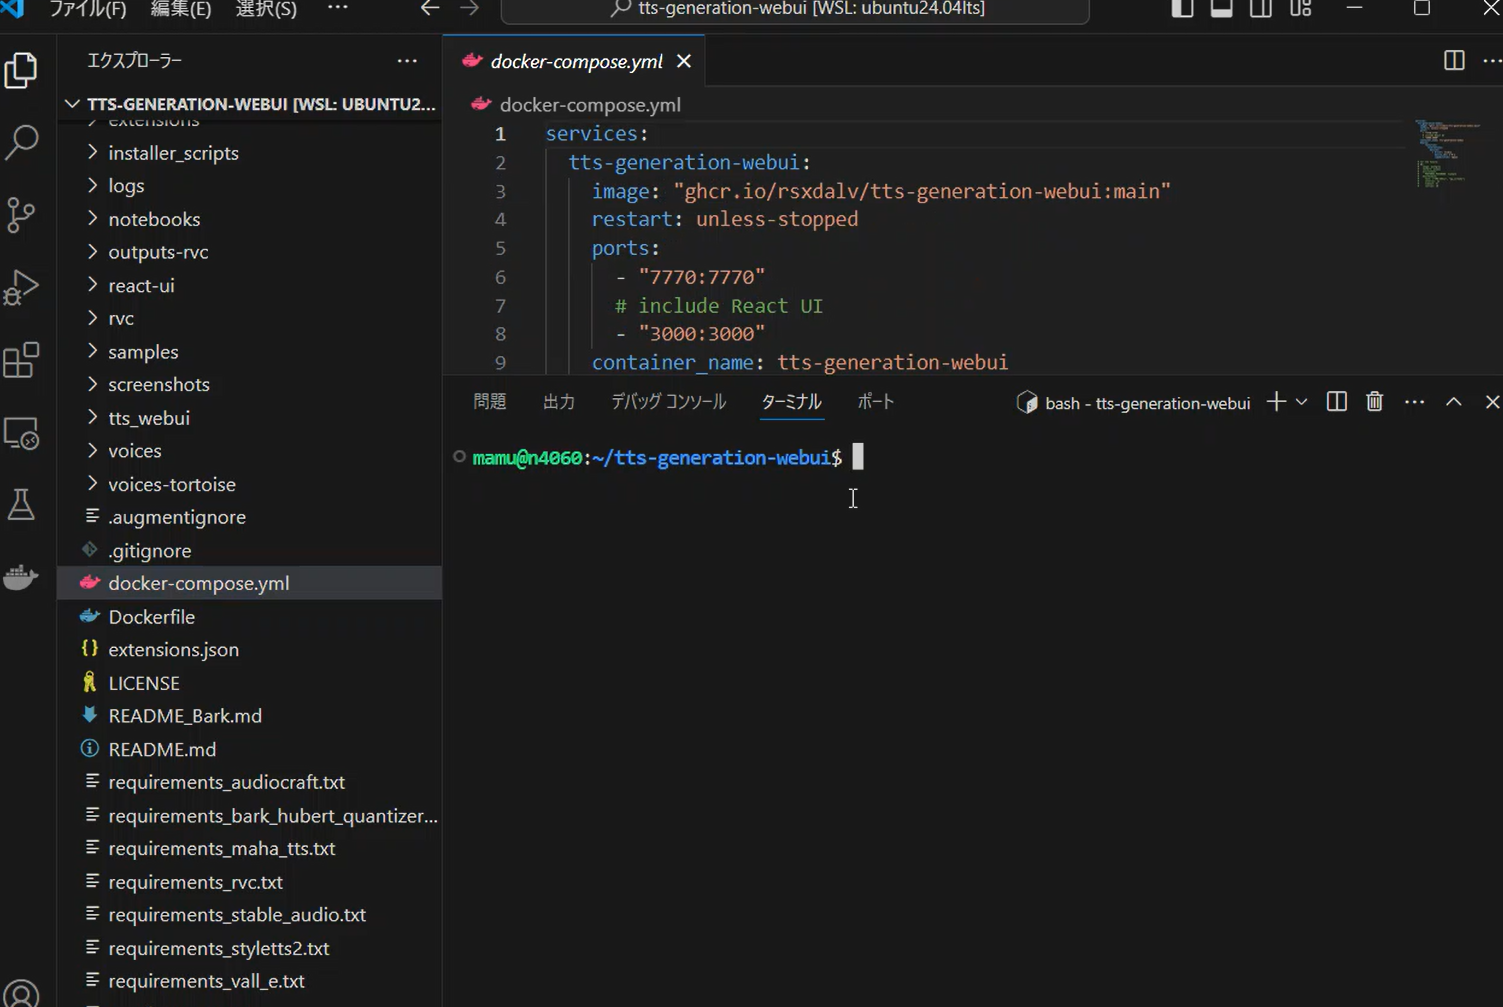
cd tts-generation-webuiPro Tip: I used VSCode for this process, which made it easy to navigate directories through its GUI interface. VSCode is particularly useful for quickly viewing and managing project files.

Downloading and Verifying the Docker Image
To download the project’s Docker image, run:
docker pull ghcr.io/rsxdalv/tts-generation-webui:mainAfter downloading, check the image size using:
docker imagesNote: You’ll notice the image is quite large, which is typical for AI-related Docker images.

Starting and Verifying the Container
Launch the container using Docker Compose:
docker compose up -dTo verify that the container is running properly, check its status:
docker psIf everything is working correctly, you should see your container listed as running.

Checking Logs and Understanding Docker Benefits
To verify that your container is running properly, check the logs using:
docker logs tts-generation-webuiYou’ll see information like this in the logs:
==========
== CUDA ==
==========

CUDA Version 11.8.0

Container image Copyright (c) 2016-2023, NVIDIA CORPORATION & AFFILIATES. All rights reserved.

This container image and its contents are governed by the NVIDIA Deep Learning Container License.
By pulling and using the container, you accept the terms and conditions of this license:
https://developer.nvidia.com/ngc/nvidia-deep-learning-container-license

A copy of this license is made available in this container at /NGC-DL-CONTAINER-LICENSE for your convenience.


> tts-generation-webui-react@0.1.0 start
> next start

  ▲ Next.js 13.5.6
  - Local:        http://localhost:3000

 ✓ Ready in 213ms
/usr/local/lib/python3.10/dist-packages/gradio/components/dropdown.py:226: UserWarning: The value passed into gr.Dropdown() is not in the list of choices. Please update the list of choices to include: None or set allow_custom_value=True.
  warnings.warn(
Key Information in the Logs
CUDA Support
The logs begin by showing the CUDA version information. While this project enables GPU-accelerated processing, setting up CUDA and NVIDIA drivers manually can be complex. Docker simplifies this by providing a pre-configured environment with all necessary dependencies.
License Information
The logs indicate that this container image is provided under the NVIDIA Deep Learning Container License. Using Docker ensures you’re working with properly licensed software in a pre-configured environment.
Application Status
You can see that the Next.js frontend is running on http://localhost:3000. This demonstrates how Docker handles complex application setups automatically, eliminating the need for manual configuration.
Python Environment
The Python library warnings and messages in the logs confirm that the application is functioning correctly. Thanks to Docker, all required Python packages are pre-installed in the container, saving you from manual package management.
About the Installer – A Second Look
Earlier I mentioned that the installer was the easiest option, but there’s more to consider. While the included installer (start_tts_webui.bat) might seem like the simplest solution for beginners, it actually requires careful environment checking and manual CUDA version installation. This can be challenging for newcomers, especially when trying to utilize GPU capabilities.
Why I Chose Docker
My decision to use Docker was based on several key challenges in environment setup:
Automated Management of CUDA and Dependencies
- Docker images come with pre-configured CUDA versions and dependencies
- Eliminates version conflicts with host environments
- Prevents manual configuration issues
Consistent Environment
- Same project setup works across all platforms
- Guaranteed consistency whether using Linux, Windows, or MacOS
- No platform-specific troubleshooting needed
Simplified Troubleshooting
- Easy access to detailed logs via docker logs command
- Quick problem identification and resolution
- Streamlined debugging process
For beginners and those looking for long-term stability, Docker proves to be an excellent choice.
The venv Alternative
This project also supports running in a Python virtual environment (venv) on both Linux and Windows. The included start_tts_webui.sh script is designed for Linux users to run the project directly in a Python virtual environment. Windows users can achieve the same by creating a virtual environment and installing dependencies.
Benefits of Using venv:
- Lightweight setup without additional tools like Docker
- Creates isolated environments for each project
- Easier local debugging and customization
However, since this method requires knowledge of Python and CUDA setup, Docker remains the more accessible option for beginners.
Accessing the Web Interface
After starting your Docker container, access the web interface at:
http://localhost:3000Understanding the Address
- localhost refers to your own PC
- For remote access, use your host PC’s IP address
- Port 3000 is the default – can be changed in docker-compose.yml if needed
Troubleshooting Display Issues
If the interface doesn’t appear, try these steps:
- Verify container status:
docker psIf status isn’t “Up”, check logs using docker logs
- Resolve port conflicts:
- If port 3000 is in use, change the port in Docker settings
- Common with other web development tools
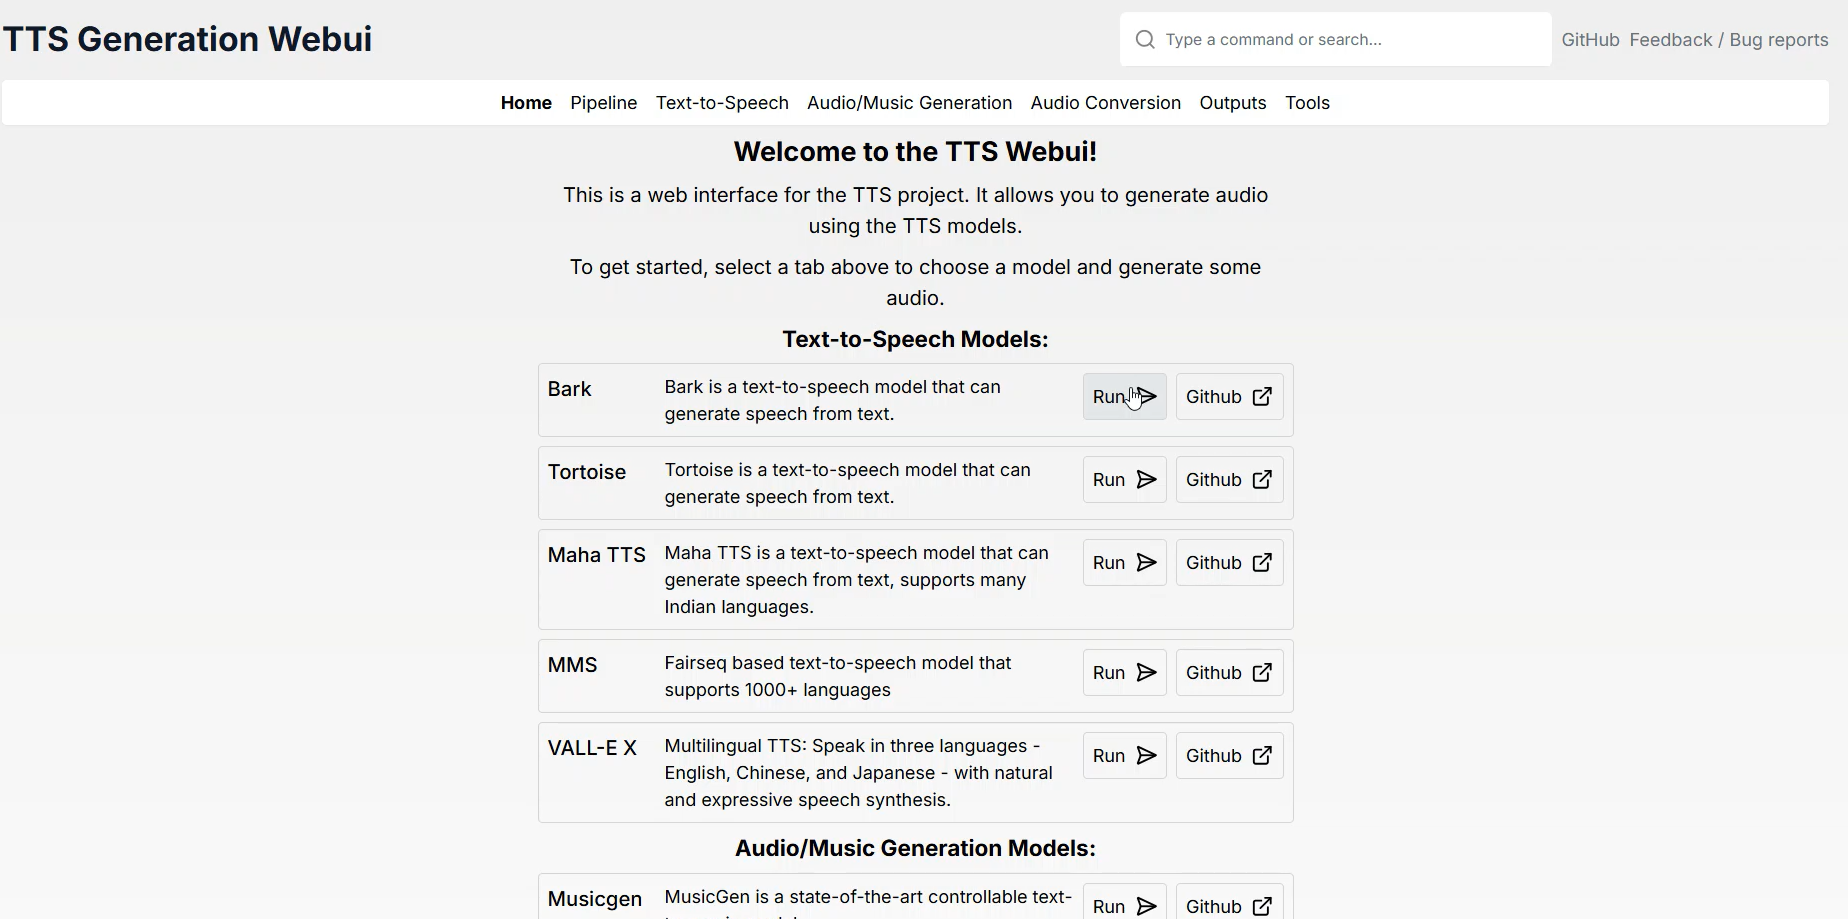
The Interface
Once connected, you’ll see the web interface for voice and music generation. From here, you can experiment with various features and customize settings to your needs.


