WhisperSpeech Overview
Advanced Text-to-Speech Technology: WhisperSpeech transforms written text into lifelike speech, allowing users to listen to content rather than read it.
Fully Open Source: The entire codebase is freely available for anyone to use, modify, and distribute, fostering community-driven innovation and improvements.
Expanding Language Support: While initially focused on specific languages, WhisperSpeech has a roadmap for supporting multiple languages, enabling text-to-speech conversion across diverse linguistic backgrounds.
State-of-the-Art Speech Quality: WhisperSpeech stands out for its remarkably natural-sounding output that closely resembles human speech patterns, making it suitable for professional applications.
Practical Applications
Digital Accessibility: Create high-quality audiobooks from text documents, significantly improving accessibility for visually impaired individuals and those with reading difficulties.
Voice-Enabled Assistants: Power voice assistants and interactive systems with natural-sounding speech capabilities that enhance user experience.
Language Learning Tools: Help language students master proper pronunciation by providing accurate audio examples of written text in various languages.
Project Resources
The WhisperSpeech project is hosted on GitHub, providing a comprehensive set of resources:
GitHub Repository: Find the complete project at https://github.com/collabora/WhisperSpeech
Core Components:
- Source Code: Well-structured Python implementation of the complete TTS system
- Documentation: Comprehensive guides for setup, configuration, and usage
- Tutorial Notebooks: Interactive Jupyter notebooks demonstrating practical implementation examples
For detailed instructions and the latest updates, refer to the project’s README file and official documentation.
Installation Guide
This guide walks you through setting up WhisperSpeech in a protected environment using Python virtual environments. The instructions below have been updated to reflect current best practices.
System Requirements
Hardware & Software Prerequisites:
- CUDA 12.x (Latest version recommended)
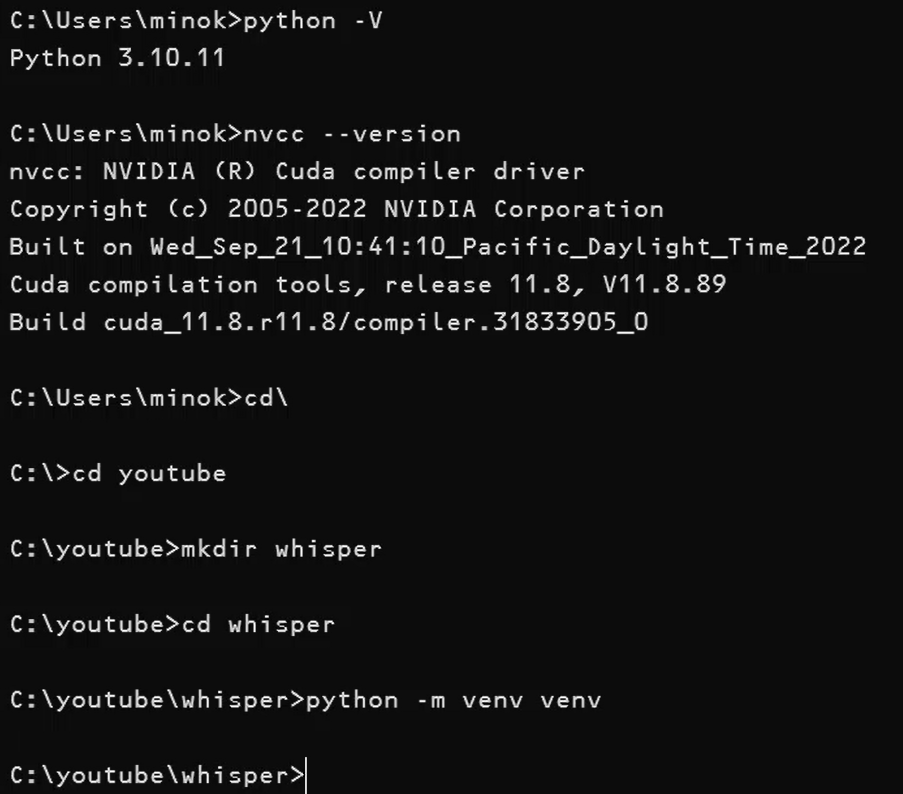
- Python 3.10+ (Verified with
python -V) - Windows OS (Instructions can be adapted for other operating systems)
Environment Compatibility
Critical Compatibility Considerations:
PyTorch-CUDA Alignment: PyTorch requires a specific CUDA version. For example, PyTorch built for CUDA 12.x requires the corresponding CUDA version on your system.
Driver Requirements: Your GPU drivers must be compatible with your chosen CUDA version. Newer CUDA versions typically require updated drivers.
Verifying Your Setup
Check System CUDA Version:
nvcc --versionSelect Compatible PyTorch Version: Visit the PyTorch website to identify the correct version for your system’s CUDA installation.

Creating a Virtual Environment
Step 1: Prepare Your Directory Structure
Open a command prompt or PowerShell terminal and create a dedicated project directory:
cd\
cd youtube
mkdir whisper
cd whisper
Step 2: Set Up a Python Virtual Environment
Create an isolated Python environment to avoid conflicts with your system packages:
python -m venv venvStep 3: Activate the Environment
Enable the virtual environment to use its isolated package space:
venv\Scripts\activateYou’ll notice your command prompt changes to indicate the active environment.
Installing Required Components
Step A: Install PyTorch with CUDA Support
First, install PyTorch with appropriate CUDA support. For current systems, use:
pip3 install torch torchvision torchaudio --index-url https://download.pytorch.org/whl/cu121Note: The command above installs PyTorch with CUDA 12.1 support. Adjust the version number (
cu121) to match your system’s CUDA installation.
Step B: Install WhisperSpeech
Install the WhisperSpeech package directly from PyPI:
pip install WhisperSpeechUnderstanding the Installation Components
PyTorch Ecosystem:
- torch: The core PyTorch library providing tensor computations and neural network capabilities
- torchvision: Extensions for computer vision tasks and image processing
- torchaudio: Specialized audio processing tools and functionality
Using a virtual environment offers several advantages:
- Isolates project dependencies from your system Python
- Enables easy cleanup by simply deleting the environment directory
- Prevents conflicts between different projects with varying requirements
Creating Your First WhisperSpeech Script
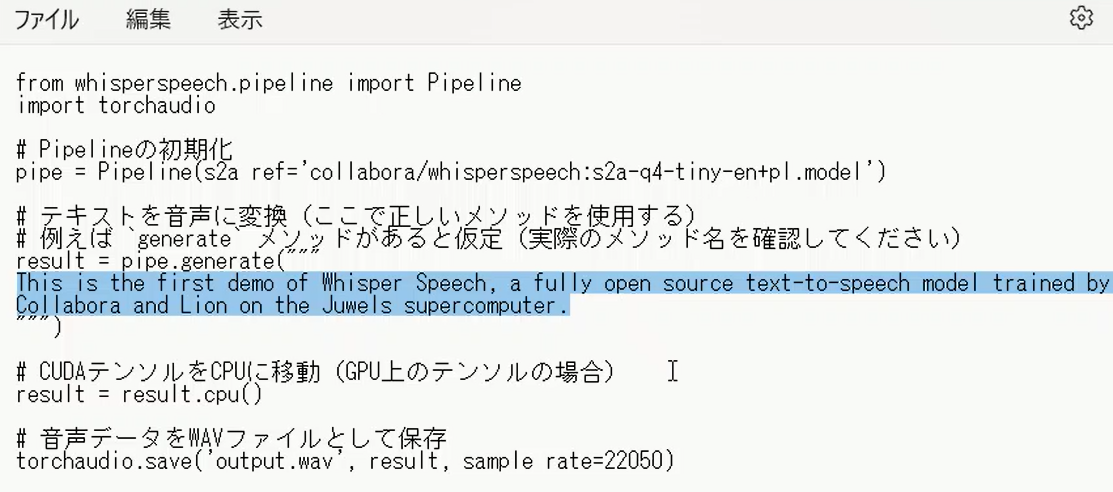
Create a file named test.py in your project directory with the following code:
# Here's the WhisperSpeech test code
from whisperspeech.pipeline import Pipeline
import torchaudio

# Initialize Pipeline
pipe = Pipeline(s2a_ref='collabora/whisperspeech:s2a-q4-tiny-en+pl.model')

# Convert text to speech
result = pipe.generate("""
This is the first demo of Whisper Speech, a fully open source text-to-speech model trained by Collabora and Lion on the Juwels supercomputer.
""")

# Move CUDA tensor to CPU
result = result.cpu()

# Save audio data as WAV file
torchaudio.save('output.wav', result, sample_rate=22050)

This script performs several key operations:
- Creates a WhisperSpeech pipeline
- Generates synthesized speech from the provided text
- Transfers the resulting tensor from GPU to CPU memory
- Saves the audio as a WAV file
Troubleshooting Common Errors
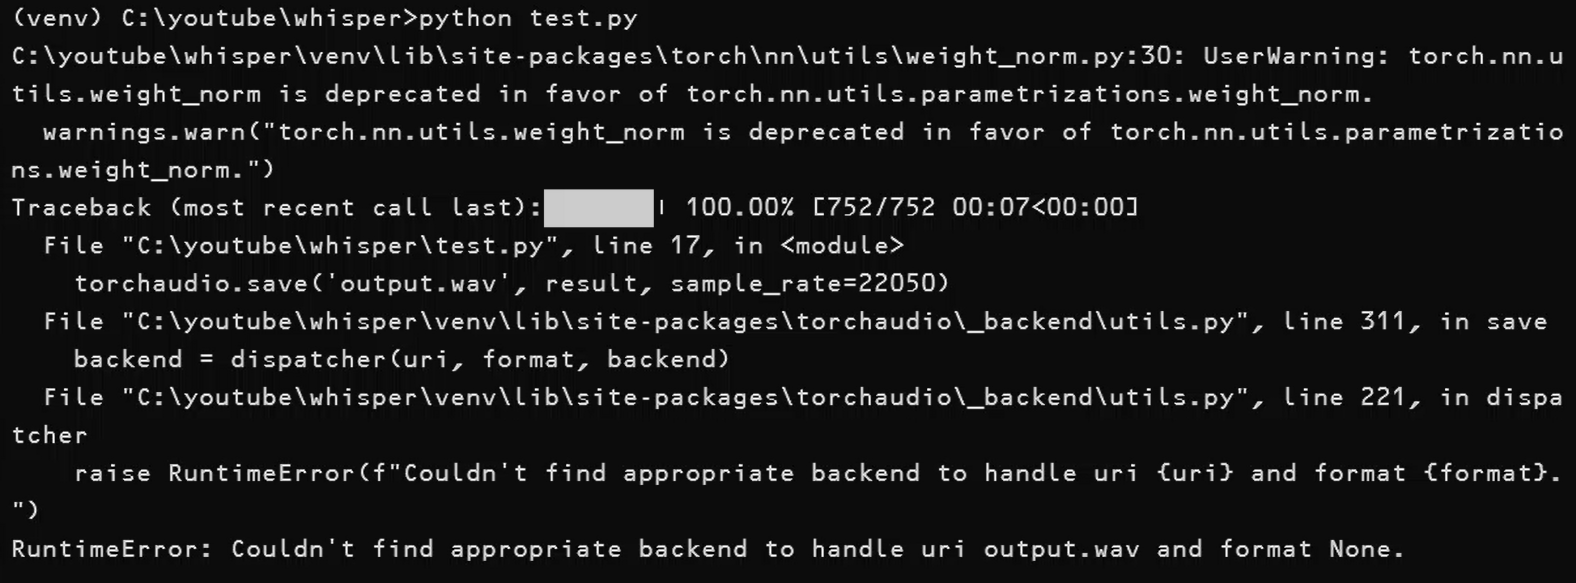
When running the script, you might encounter an error like this:
(venv) C:\youtube\whisper>python test.py
C:\youtube\whisper\venv\lib\site-packages\torch\nn\utils\weight_norm.py:30: UserWarning: torch.nn.utils.weight_norm is deprecated in favor of torch.nn.utils.parametrizations.weight_norm.
warnings.warn("torch.nn.utils.weight_norm is deprecated in favor of torch.nn.utils.parametrizations.weight_norm.")
Traceback (most recent call last):
File "C:\youtube\whisper\test.py", line 17, in
torchaudio.save('output.wav', result, sample_rate=22050)
File "C:\youtube\whisper\venv\lib\site-packages\torchaudio_backend\utils.py", line 311, in save
backend = dispatcher(uri, format, backend)
File "C:\youtube\whisper\venv\lib\site-packages\torchaudio_backend\utils.py", line 221, in dispatcher
raise RuntimeError(f"Couldn't find appropriate backend to handle uri {uri} and format {format}.")
RuntimeError: Couldn't find appropriate backend to handle uri output.wav and format None.

What’s Happening? This error occurs because TorchAudio requires additional audio backend libraries to handle file operations. The message indicates that no appropriate audio backend was found to save the WAV file.
Solving the Backend Error
The Missing Pieces
TorchAudio relies on external audio processing libraries. For Windows users, the most reliable solution is to install the soundfile package:
pip install soundfileFor more comprehensive audio handling capabilities, also install:
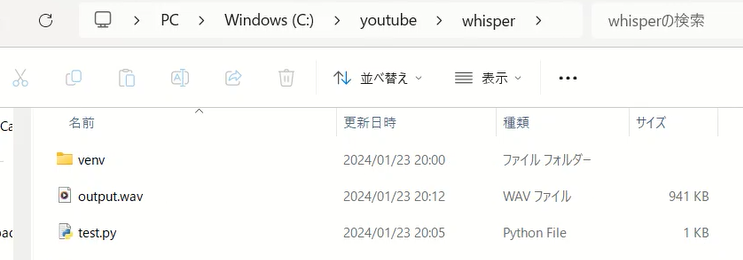
pip install soxAfter installing these dependencies, running the script again should successfully create your audio file.


Advanced Feature: Voice Cloning
One of WhisperSpeech’s most impressive capabilities is voice cloning—generating speech that mimics a specific speaker’s voice characteristics. Let’s explore this in an interactive Jupyter environment.
Setting Up Jupyter Notebooks
Jupyter notebooks offer an ideal environment for experimenting with WhisperSpeech, allowing you to:
- Run code interactively, section by section
- Visualize and play audio results instantly
- Document your process with rich text explanations
Installing Jupyter:
pip install notebook ipywidgetsThe ipywidgets package is crucial for proper progress bar display in notebooks.
Starting Jupyter:
jupyter notebookThis command launches a browser window with the Jupyter interface, where you can create a new Python notebook.

Working with Jupyter Notebooks
After launching Jupyter, create a new Python notebook to experiment with WhisperSpeech’s capabilities.
Verifying GPU Availability
First, let’s confirm that PyTorch can access your GPU. In a notebook cell, enter and run:
import torch

# Check if GPU is available
print(f"CUDA Available: {torch.cuda.is_available()}")

# Display GPU device information
if torch.cuda.is_available():
    print(f"GPU Device: {torch.cuda.get_device_name(0)}")
    print(f"CUDA Version: {torch.version.cuda}")
If this returns CUDA Available: True followed by your GPU’s name, you’re ready to proceed with GPU-accelerated speech synthesis.
Attempting Voice Cloning
Let’s try a voice cloning example by using a reference audio sample. Enter this code in a new cell:
from whisperspeech.pipeline import Pipeline

# Initialize the pipeline
pipe = Pipeline()

# Generate speech using an online audio reference
pipe.generate_to_notebook("""
This is a demonstration of WhisperSpeech's voice cloning capability, using a fully open source text-to-speech model trained by Collabora.
""",
lang='en',
speaker='https://upload.wikimedia.org/wikipedia/commons/7/75/Winston_Churchill_-_Be_Ye_Men_of_Valour.ogg')
Troubleshooting Permissions Error
When executing the code above, you might encounter an error like:
OSError: [WinError 1314] The client does not have the required privilege.: [file paths]
Root Cause: This error occurs because SpeechBrain (used internally by WhisperSpeech) attempts to create symbolic links in the cache directory, but standard Windows user accounts lack the required permissions.
Solution:
1.Close Jupyter notebook
2.Reopen Command Prompt as administrator (right-click and select “Run as administrator”)
3.Navigate to your project directory and activate the virtual environment:
cd\
cd youtube
cd whisper
venv\Scripts\activate
4.Launch Jupyter notebook with elevated privileges:
jupyter notebookHandling Audio File Loading Error
Even with administrator privileges, you might encounter a new error:
LibsndfileError: Error opening 'https://upload.wikimedia.org/wikipedia/commons/7/75/Winston_Churchill_-_Be_Ye_Men_of_Valour.ogg': System error.
Root Cause: The TorchAudio library used by WhisperSpeech cannot directly stream audio from URLs. It requires local file access.
Solution:
- Download the reference audio file manually from the URL
- Save it to your project directory (for example, as
churchill_speech.ogg) - Modify your code to use the local file path:
from whisperspeech.pipeline import Pipeline

# Initialize the pipeline
pipe = Pipeline()

# Generate speech using a local audio reference
pipe.generate_to_notebook("""
This is a demonstration of WhisperSpeech's voice cloning capability, using a fully open source text-to-speech model trained by Collabora.
""",
lang='en',
speaker='churchill_speech.ogg')  # Use local file path instead of URL
Installing Additional Dependencies
If you encounter issues with progress bars or widgets in Jupyter, install these dependencies:
pip install ipywidgets
jupyter nbextension enable --py widgetsnbextension
These packages ensure proper visualization of progress during the speech generation process.
Successful Voice Cloning Implementation
After resolving the permission and file access issues, your WhisperSpeech voice cloning setup should work successfully. When properly configured, the notebook will:
- Load the reference audio file
- Extract speaker characteristics
- Generate new speech with the source speaker’s voice profile
- Play the synthesized audio directly in the notebook
The output will sound remarkably similar to the original speaker while saying entirely new text.
Advanced WhisperSpeech Techniques
Customizing Speech Parameters
WhisperSpeech offers several parameters to refine your generated speech:
from whisperspeech.pipeline import Pipeline

pipe = Pipeline()

# Generate speech with custom parameters
pipe.generate_to_notebook(
    """Your custom text goes here.""",
    lang='en',                  # Language code
    speaker='reference.ogg',    # Reference voice file
    cps=12                      # Characters per second (speech rate)
)
The cps parameter controls speech speed – lower values create slower, more deliberate speech, while higher values increase the pace.
Batch Processing Text Files
For converting large documents to speech, create a simple script:
from whisperspeech.pipeline import Pipeline
import torchaudio
import torch

def text_to_speech_file(input_file, output_file, reference_speaker=None):
    # Initialize pipeline
    pipe = Pipeline()

    # Read text from file
    with open(input_file, 'r', encoding='utf-8') as f:
        text = f.read()

    # Generate speech
    result = pipe.generate(text, speaker=reference_speaker)

    # Save as audio file
    if torch.cuda.is_available():
        result = result.cpu()
    torchaudio.save(output_file, result, sample_rate=22050)

    print(f"Successfully converted {input_file} to {output_file}")

# Example usage
text_to_speech_file('my_document.txt', 'my_audiobook.wav', 'reference_voice.ogg')
Performance Optimization Tips
GPU Memory Management
WhisperSpeech can be memory-intensive with larger texts. For optimal performance:
- Process text in smaller chunks (paragraphs or sentences)
- Clear GPU cache between generations for long sessions:
import torchtorch.cuda.empty_cache()
Improving Audio Quality
For professional-grade output:
- Use high-quality reference recordings (minimal background noise)
- Record in a quiet environment with proper microphone technique
- Minimize compression artifacts in reference files (use WAV or FLAC when possible)
Future Developments
The WhisperSpeech project continues to evolve with:
- Support for additional languages
- Improved naturalness in speech prosody
- More efficient models for faster generation
- Enhanced emotion and emphasis control
Keep an eye on the official GitHub repository for the latest updates and features.
Conclusion
WhisperSpeech represents a significant advancement in open-source text-to-speech technology. By following this guide, you’ve gained a comprehensive understanding of:
- Setting up a proper WhisperSpeech environment
- Generating basic text-to-speech output
- Implementing voice cloning capabilities
- Troubleshooting common issues and error messages
This powerful tool opens creative possibilities for accessibility solutions, content creation, and voice-driven applications—all while remaining completely open source and freely available to the community.
For a visual demonstration of this setup process and more examples, you can visit our YouTube tutorial.


