
The Mystery of Phantom Disk Space in WSL: When Deletion Doesn’t Free Up Space
For anyone using Windows Subsystem for Linux (WSL) for development, encountering a scenario where deleting hefty files barely makes a dent in your Windows disk space can be all too familiar. This isn’t a bug—it’s a quirk of how WSL manages its virtual storage. In this article, we delve into why disk space seems “stuck” even after file removal, and we introduce an automated solution designed to simplify reclaiming that lost space.
Uncovering the Hidden Mechanics Behind WSL’s Phantom Disk Space
When you delete large files within your WSL environment, you might expect an immediate reduction in your Windows disk usage. However, the reality is more nuanced. Let’s break down the underlying factors:
1. Virtual Disk Characteristics
WSL2 leverages a dynamically allocated virtual disk file (typically named ext4.vhdx) to store the Linux filesystem. Here’s what you need to know:
- Expansion Without Automatic Contraction:
The VHDX file expands as you add data, but—by design—it does not shrink automatically when you delete files. - Perceived vs. Actual Free Space:
Within the Linux environment, the filesystem reports the freed space correctly. In contrast, Windows continues to see the unchanged size of the VHDX file.
To illustrate, consider the following table:
| Aspect | Behavior |
|---|---|
| Expansion | Increases as more data is stored |
| Contraction | Does not reduce automatically after file deletion |
| Windows Perspective | Continues to show the full allocated size of the VHDX, regardless of internal deletions |
| Linux Perspective | Accurately reflects the freed space within its own filesystem |
2. Dual Layered Disk Space Management
WSL2 essentially employs two separate layers of disk management:
- Inside Linux:
- When you delete files, the Linux filesystem immediately recognizes the reclaimed space.
- This makes it seem as though storage has been freed.
- On the Windows Host:
- The underlying VHDX file remains at its expanded size.
- No automatic process compresses or shrinks this virtual disk, leaving Windows unaware of the freed space.
This disparity between the two layers is what creates the “phantom” disk space issue.
3. Limitations in Dynamic Shrinking
Currently, WSL2 lacks an automatic mechanism to reclaim the unused space within the VHDX file. Key limitations include:
- No Auto-Deallocation:
Unused space inside the virtual disk isn’t automatically released. - Absence of Built-In Shrinking Functions:
Users must manually initiate disk compaction to reclaim wasted space. - Necessity for External Tools or Scripts:
Without intervention, the discrepancy between internal and external disk usage persists.
A Real-World Lesson: From Frustration to Innovation
A while back, I published an in-depth guide detailing manual steps to address this issue. However, feedback from a friend—who admitted the technical jargon made the process hard to follow—sparked a crucial realization: Even the most detailed guides can fail when they’re not user-friendly.
This experience drove me to develop an automated solution that anyone, regardless of technical expertise, can use. By streamlining the process into a few simple steps, this tool takes the guesswork out of reclaiming lost disk space in WSL.
For those interested in the original manual procedure, please refer to the detailed guide here:
In-Depth WSL Disk Optimization Guide

Introducing the Automated WSL Disk Compaction Script
To address the phantom disk space issue without delving into complicated manual processes, I’ve developed an automated script that simplifies everything. This solution comes in two flavors:
A. PowerShell Script (.ps1)
This script is designed to automatically:
- Locate the VHDX File:
It searches for the ext4.vhdx file (commonly found in the local app data directory for Ubuntu installations). - Ensure Safe Operation:
Before any operation, the script detaches the disk if it’s currently in use to avoid conflicts. - Execute Disk Compaction:
It mounts the virtual disk in a read-only mode and runs thediskpartcommand to compact the VHDX file—effectively releasing the unutilized space. - Handle Errors Gracefully:
Robust error handling ensures that any issues during the process are communicated clearly, and temporary files are cleaned up.
Here’s an overview of the workflow:
| Step | Description |
|---|---|
| Discovery | Automatically locate the ext4.vhdx file within your system’s expected directories. |
| Detachment | Detach the virtual disk from any active process to ensure safe manipulation. |
| Compaction | Mount the disk in read-only mode and run diskpart to shrink the VHDX file by reclaiming space. |
| Cleanup | Remove any temporary files and handle errors to maintain system stability. |
Remember:
- Prerequisites:
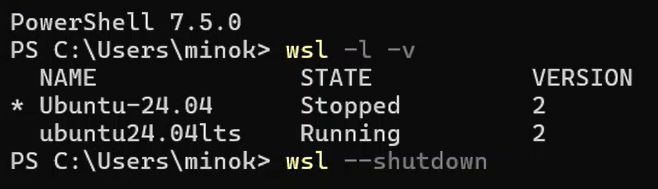
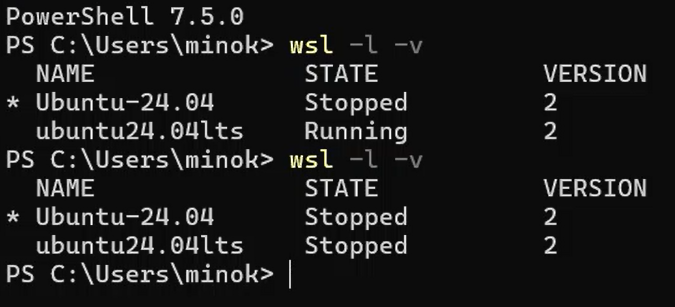
- Ensure WSL is stopped using
wsl --shutdown. - Run PowerShell as an administrator.
- Ensure WSL is stopped using
B. Batch Script (.bat)
For users who prefer or require a more direct approach—especially if you already know the location of your VHDX file—there’s a batch script alternative. This version:
- Verifies the VHDX File Location:
Checks if the specified virtual disk file exists. - Generates and Executes a
diskpartScript:
Automates the compaction process using a pre-configured set of commands. - Includes Comprehensive Error Handling:
Ensures that each step is verified, and any issues are promptly reported.
Key Advantages of the Batch Script:
- Ideal for environments with multiple WSL instances.
- Particularly useful if you have installed WSL in a custom location.
- Simple to configure—just specify the path to your VHDX file.
How to Save and Execute the Scripts
1. PowerShell Script (.ps1)
Saving the Script:
- Copy the provided PowerShell code.
- Paste it into your preferred text editor (such as Notepad or Visual Studio Code).
- Save the file with a clear name like
WSL_Compact.ps1.
#----------------------------------------------
# Script to automatically detect the WSL VHD file and, if it is already attached,
# detach it before executing diskpart to compact it.
#----------------------------------------------
# Please stop WSL beforehand (e.g., wsl --shutdown)
# Run PowerShell with administrative privileges

# Function to create and execute a temporary script for diskpart
function Invoke-DiskPartScript {
    param (
        [Parameter(Mandatory)]
        [string]$ScriptContent
    )
    # Create a random temporary filename
    $tempFile = Join-Path $env:TEMP ("dp_" + [System.IO.Path]::GetRandomFileName() + ".txt")
    try {
        # Write the temporary file using ASCII encoding
        $ScriptContent | Out-File -FilePath $tempFile -Encoding ascii
        Write-Host "Executing diskpart: $tempFile" -ForegroundColor Yellow
        # Capture and display the output from diskpart
        Start-Process -FilePath "diskpart.exe" -ArgumentList "/s `"$tempFile`"" -NoNewWindow -Wait
        Write-Host $result
    }
    finally {
        if (Test-Path $tempFile) {
            Remove-Item $tempFile -Force
        }
    }
}

try {
    # Recursively search for the ext4.vhdx path (for the Ubuntu package)
    $wslVhd = Get-ChildItem "$env:LOCALAPPDATA\Packages\*Ubuntu*\LocalState\ext4.vhdx" -Recurse -ErrorAction Stop | Select-Object -First 1

    if (-not $wslVhd) {
        throw "WSL VHD file not found. Please ensure the Ubuntu package is installed."
    }

    Write-Host "Found VHD file: $($wslVhd.FullName)" -ForegroundColor Green

    # ★ Since the VHD might already be attached, first attempt to detach it ★
    $detachScript = @"
select vdisk file="$($wslVhd.FullName)"
detach vdisk
"@

    Write-Host "Detaching the possibly attached VHD..." -ForegroundColor Yellow
    Invoke-DiskPartScript -ScriptContent $detachScript

    # Main process: attach (read-only) → compact → detach
    $compactScript = @"
select vdisk file="$($wslVhd.FullName)"
attach vdisk readonly
compact vdisk
detach vdisk
"@

    Write-Host "Executing compact operation with diskpart..." -ForegroundColor Yellow
    Invoke-DiskPartScript -ScriptContent $compactScript

    Write-Host "Operation completed successfully." -ForegroundColor Green

} catch {
    Write-Error "An error occurred: $_"
    exit 1
}
WSL VHD Compact Utility – Usage Instructions
Prerequisites
- Stop WSL: Before running the scripts, stop WSL by executing:
wsl --shutdown - Administrator Privileges: Ensure you run PowerShell as an administrator.
Usage Instructions
Method 1: Recommended Approach (Compatible with Windows Updates)
Open PowerShell as Administrator: Right-click on the Windows PowerShell icon and select “Run as Administrator.”
Navigate to the Script Directory:
cd "C:\Path\To\Your\Script\Directory"
Set execution policy (required after recent Windows updates):
Set-ExecutionPolicy -ExecutionPolicy RemoteSigned -Scope CurrentUser
💡 This command allows locally created scripts to run and ensures remote scripts are signed. This setting persists across PowerShell sessions and is recommended for regular use.
Run the Script:
.\CompactWSLVHD.ps1
Method 2: Session-Only Bypass (Alternative)
If you prefer not to change the execution policy permanently:
Open PowerShell as Administrator: Right-click on the Windows PowerShell icon and select “Run as Administrator.”
Navigate to the Script Directory:
cd "C:\Path\To\Your\Script\Directory"
Temporarily allow script execution (PowerShell 7 compatible):
Set-ExecutionPolicy -Scope Process -ExecutionPolicy Bypass
💡 This command allows unsigned scripts temporarily for the current PowerShell session only. Unlike RemoteSigned, Bypass avoids compatibility issues with newer PowerShell versions (especially PowerShell 7 and above).
Run the Script:
.\CompactWSLVHD.ps1
Troubleshooting
Issue: Script fails after Windows updates (January 2025)
Symptoms:
- “UnexpectedToken” parsing errors
- “Expression or statement token cannot be used” errors
- “Missing terminator” errors
Root Cause: Recent Windows updates (late 2024/early 2025) have modified PowerShell’s character encoding handling and execution policy enforcement, causing previously working scripts to fail.
Solutions:
Solution 1: Fix Execution Policy
Set-ExecutionPolicy -ExecutionPolicy RemoteSigned -Scope CurrentUser
.\CompactWSLVHD.ps1
Solution 2: Re-save Script File
- Open
CompactWSLVHD.ps1in a text editor (Notepad, VS Code, etc.) - Save the file with UTF-8 with BOM encoding
- Run the script again
Solution 3: Direct Content Execution
Get-Content ".\CompactWSLVHD.ps1" -Encoding UTF8 | Invoke-Expression
Issue: “Execution of scripts is disabled on this system”
This error indicates that the PowerShell execution policy is preventing script execution.
Check current policy:
Get-ExecutionPolicy
Apply appropriate solution:
- For permanent fix: Use Method 1 above
- For temporary fix: Use Method 2 above
Issue: PowerShell version compatibility
Some newer PowerShell versions (PowerShell 7+) may have different default behaviors:
- PowerShell 5.1 (Windows PowerShell): Use either method above
- PowerShell 7+: The
Bypassmethod (Method 2) is often more reliable
Important Notes
⚠️ Recent Windows Update Impact: If you previously used this script without issues but it suddenly stopped working after a Windows update, this is likely due to changes in PowerShell’s execution policy enforcement and character encoding handling.
🔒 Security: The execution policy is not a security boundary but a safety feature to prevent accidental execution of malicious scripts. Both methods above are safe when used with trusted scripts.
📝 File Encoding: If you’re modifying the script, always save it with UTF-8 BOM encoding to ensure compatibility with all Windows versions.
Why These Changes Were Necessary
Microsoft has tightened PowerShell’s execution policy enforcement and character encoding parsing in recent Windows updates as part of ongoing security improvements. These changes particularly affect:
- Execution Policy: More strict enforcement of script execution restrictions
- Character Encoding: Enhanced validation of script file encoding
- PowerShell 7 Integration: Better compatibility between different PowerShell versions
The updated instructions ensure your scripts work reliably across all current Windows configurations.
2. Batch Script (.bat)
Saving the Script:
- Copy the provided batch script code.
- Paste it into a text editor.
- Save the file as
WSL_Compact.bat(ensure the extension is.bat).
@echo off
setlocal enabledelayedexpansion
REM ================================================
REM Please specify the path to the WSL VHD(X) file.
REM Example: set "VHD_FILE=%LOCALAPPDATA%\Packages\...\LocalState\ext4.vhdx"
REM ================================================
set "VHD_FILE=C:\wsl\ubuntu24.04lts\ext4.vhdx"
REM Check if the VHD file exists
if not exist "%VHD_FILE%" (
echo ERROR: The specified VHD file was not found: "%VHD_FILE%"
pause
exit /b 1
)
REM Set the path for the temporary diskpart script file
set "DP_SCRIPT=%TEMP%\dp_script.txt"
REM Create the diskpart script
(
echo select vdisk file="%VHD_FILE%"
echo attach vdisk readonly
echo compact vdisk
echo detach vdisk
) > "%DP_SCRIPT%"
if errorlevel 1 (
echo ERROR: Failed to create the temporary script file.
pause
exit /b 1
)
REM Execute diskpart
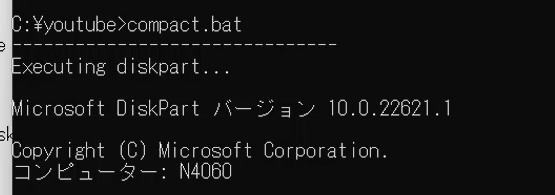
echo -------------------------------
echo Executing diskpart...
diskpart /s "%DP_SCRIPT%"
if errorlevel 1 (
echo ERROR: An issue occurred while running diskpart.
del "%DP_SCRIPT%" >nul 2>&1
pause
exit /b 1
)
REM Delete the temporary script file
del "%DP_SCRIPT%" >nul 2>&1
if exist "%DP_SCRIPT%" (
echo WARNING: Failed to delete the temporary script file: "%DP_SCRIPT%"
) else (
echo The temporary script file was deleted.
)
echo -------------------------------
echo Operation completed successfully. Well done!
pause
endlocal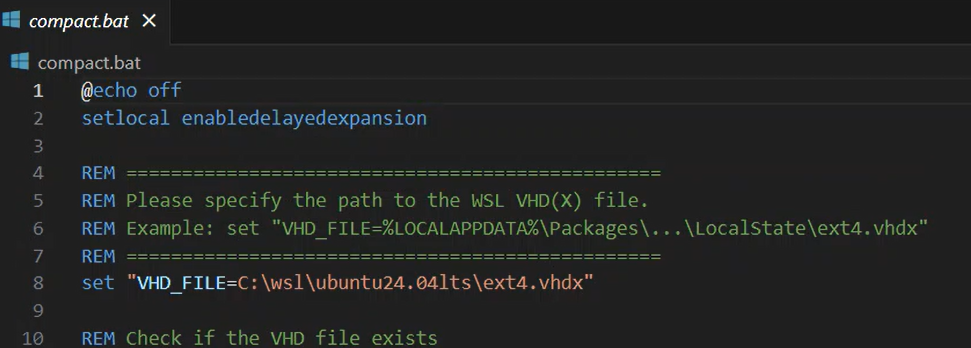
Executing the Script:
- Run as Administrator:
Right-click the file and select “Run as Administrator”
or
Open an elevated Command Prompt, navigate to the script directory, and execute:WSL_Compact.bat

Important Final Reminders
Before running either script, please keep in mind:
- Stop WSL First:
Always runwsl --shutdownto ensure no instances of WSL are active. - Administrator Rights Are a Must:
Both scripts require elevated permissions to function correctly. - Backup Your Data:
Since these scripts directly interact with your virtual disk file, make sure to back up important data beforehand. - Test in Your Environment:
Although designed for standard setups, variations in system configurations can occur. Test the script in your environment to confirm safe operation. - Use at Your Own Risk:
The provided scripts are intended as a convenience tool. Please exercise caution and ensure you fully understand the steps involved before execution.
